Showing posts with label pasta. Show all posts

Monday, July 15, 2013

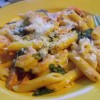
Cowboy Carbonara


Have you heard of cowboy caviar?  It's a thing.  I've never really tried it, but it's a lot like this salsa, which is fabulous.  What's Gaby Cooking has several versions, including vegetarian cowboy caviar, cowboy caviar quinoa, and cowboy caviar chopped salad.  They all look delicious, but it's the catchy name that really stuck with me.

So today I had bacon, pasta, and three pattypan squashes that my mom gave me (aren't they the prettiest squashes ever?).  I wanted to make some sort of pasta carbonara, but I didn't have any parmesan.  I came up with this version using cheddar cheese and called it cowboy carbonara.  My boyfriend laughed at me, but he ate seconds.  No cowboy can resist.

I think it might even be fun to add some black beans, tomatoes, and avocado here.  Everything goes with pasta, bacon, and cheese, right?  Go crazy.  I was also going to add cilantro but I froze it in my fridge AGAIN.  Fail.


Ingredients (serves 4):

4 slices bacon
1 pound pasta (I used orecchiette)
2-3 pattypan squash, zucchini, or summer squash, chopped
1 cup fresh or frozen corn kernels
2-3 scallions, sliced, plus extra for garnish
1 egg
4 ounces freshly grated sharp white cheddar cheese, plus extra for serving
Salt and pepper to taste

Cook the bacon in a large dry skillet over medium heat until crisp.  Set aside to drain on paper towels.  Once the bacon cools, roughly chop it.

Cook the pasta until al dente according to the package directions.  Drain, reserving one cup of the cooking water.

In a small bowl, whisk together the egg and the grated cheese.

Pour off all but one teaspoon or so of the bacon grease, and return the pan to the heat.  Add the squash and cook for about ten minutes, until tender.  Add the corn and saute for another 2-3 minutes until heated through.  Stir in the scallions and chopped bacon and reduce the heat to low.

When the pasta is done, add it to the skillet with the vegetables.  Add the egg and cheese and cook, tossing with pasta water to thin out the sauce as needed, for 2-3 minutes.  This is to make sure the egg gets cooked.  Season to taste with salt and pepper.

Serve hot, with additional cheese and/or scallions on top.


You might also like:


Yum

Monday, June 17, 2013

Homemade Pasta, Midnight Style


Did you know that if you have flour, eggs, salt, olive oil, and garlic (and a sense of adventure and a little time on your hands) you can make your own gourmet pasta dinner?

It's true, and while it's not quick or exceptionally easy, it is really fun and amazingly delicious.  Plus, I feel like making your own pasta earns you some bragging rights.  My boyfriend is tired of hearing me brag, so I'm here to share my homemade pasta conquest with you.

Ready to try it?  You know you want to!  Here are my step-by-step photos and notes on the process.  Scroll down for a recipe for midnight fettucine--a simple sauce to let your pasta shine.

This is a special recipe from America's Test Kitchen for people who DON'T have special pasta machines.  So if you're fancy and do have a machine, this might not be the right recipe for you.  But, leave me a comment about what machine you have and how you like it!

Here's the dough recipe (from America's Test Kitchen).

Ingredients:

2 cups flour, plus extra
2 large eggs
6 large egg yolks (save the whites for this or this or a healthy breakfast scramble)
1 tablespoon salt
2 tablespoons olive oil

Put 2 cups of flour and all the remaining ingredients in your food processor.  Whir until the mixture comes together into a ball.

Touch the dough.  If it sticks to your fingers, add more flour a tablespoon at a time until it's just a little bit tacky.

I found this hard to do in the food processor, so I dumped the dough out onto a cutting board and worked in extra flour until it felt right.  I added 3-4 tablespoons.


Dump the dough out onto a lightly floured surface and knead it with the palms of your hands for a couple of minutes, until it feels really smooth.


Form a cylinder of dough that's about six inches long.  Flour it lightly on all sides (otherwise it will stick) and wrap it in plastic wrap.

Let the dough rest at room temperature for at least one hour and up to four.  The longer you let it rest, the easier it will be to roll out.  I let mine sit for an hour and a half and rolling it out took a little elbow grease, but went just fine.


When you are ready to roll out your dough, unwrap it.  Using a sharp knife (I subsequently discovered that my pizza cutter is NOT super sharp), cut the dough into six equal pieces.

You will work with one piece at a time, so wrap the remaining pieces back up with plastic wrap (flour them a little first and wrap them individually).


Using your hands, form a 3 x 3 inch square with the dough and flour it lightly on both sides.
Use a rolling pin to roll the dough out into a six inch square.  As you can see, mine wasn't really square.  I did my best.  Lightly flour it again on both sides.


Place the rolling pin in the middle of the dough, and using one motion, pull the rolling pin toward you as you roll out the bottom half of the dough.

Then, place the rolling pin in the middle again.  This time, push the rolling pin away from you to roll out the top half of the dough.

Repeat this process until the dough is about 20 inches long and 6 inches wide, and you can see the outline of your fingers through it.

Set rolled out strips aside on a kitchen towel to dry a little while you roll out the rest of the dough.

When you finish rolling out the strips, go back and get the first one.  The edges should feel a little firm and dry.  If it isn't floury, flour it lightly on both sides so it won't stick to itself.

Starting with one of the short ends of the dough, roll up the strip by folding over two inch segments.  Don't push the layers together, just roll them up very gently.


Using a very sharp knife, slice the roll crosswise into 1/2 inch wide slices.

Unroll them with your fingers.  Ta-da!  Fresh fettucine.  


Set the finished pasta strips aside on a baking sheet while you finish rolling and slicing the rest of the dough.

Cook the pasta within an hour, or freeze it.  To freeze, place the whole baking sheet in the freezer until the pasta is firm.  Transfer to an airtight zip top bag and store for up to two weeks.  You can boil the pasta straight from the freezer.

To cook the pasta, boil in a large pot of salted water until just al dente, 1-3 minutes (it might take longer with frozen pasta).  Fresh pasta cooks really fast, so check it early!

I used my fresh pasta to make midnight fettucine.  This easy pasta is called midnight fettucine (or spaghetti) because chefs like to make it as quick and easy meal when they get home from work at midnight.  I loved it with this fresh pasta, but you can make it with any pasta and it will still be delicious.  You can dress it up with parmesan, parsley, or red pepper flakes if you want, but I like it best just the way it is.

Ingredients:

1 pound pasta
1/3 cup olive oil
10-15 cloves of garlic, peeled and minced
Salt to taste

Heat the olive oil in a large skillet over medium low heat.  Add the garlic and cook, stirring frequently, for about ten minutes.  You want the garlic to soften and sizzle but not brown, so reduce the heat if it starts to turn golden.

Cook the pasta until al dente and drain, reserving one cup of the cooking water.

Toss the pasta with the garlic and oil, season to taste with salt, and add cooking water as necessary to thin out the sauce.  Serve hot.


Yum

Wednesday, June 5, 2013

Penne with Cilantro Edamame Pesto


Have I mentioned how much I love pasta?  And pesto?  They are the best, and a great combination.  I'm into making pesto with whatever I have on hand, and experimenting with the colors and flavors I get from using different ingredients.  For example, the cilantro avocado pesto I made was great for a cool pasta salad.


This time, I used cilantro again (but you could also use basil) and added edamame for color and some extra protein.  The pesto ended up a beautiful shade of mint green.  And don't worry, it doesn't taste like pasta with soybeans.

You have to try this!  It's quick and satisfying, and I really can't get over the color!  Also, I'm sharing it at this week's Thursday's Treasures.  Go check out the great stuff everyone is posting!


Ingedients (serves 4-6):

1 pound penne or other cut pasta
1 cup frozen shelled edamame
3/4 cup olive oil
1-2 cloves garlic
1 cup freshly grated parmesan cheese, divided, plus extra for serving
Sea salt to taste
1 cup loosely packed fresh cilantro
1/4 cup pine nuts, toasted (optional)

Blanch the edamame by cooking it in boiling water for 3 minutes or until tender.  Drain and set aside to cool slightly.

Cook the pasta until al dente, reserving one cup of the pasta water.  Drain and set aside.

In a food processor, combine the edamame, garlic, 1/2 cup of parmesan cheese, cilantro, and a pinch of salt.  With the motor running, add the olive oil in a steady stream.  Taste the pesto to see if it needs more salt.

When the pasta is done, stir in the remaining 1/2 cup of parmesan cheese.  Stir in the pesto, and add pasta water as necessary to thin out the sauce.  Serve hot with additional parmesan for sprinkling.
Yum

Sunday, May 26, 2013

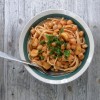
Linguine Rustico with Whole Cloves of Garlic


I love pasta!  Here is a delicious, vegan pasta dish that is not for the faint of heart.  It's filling, packed with flavor and the perfect amount of spice, and easy to make.  The chickpeas make it hearty and satisfying, and the garlic cloves are mellow and almost sweet after simmering to golden perfection in the olive oil.

Ingredients (serves 2):

1/4 cup olive oil
25 cloves of garlic, peeled
8 ounces linguine
1 15 ounce can chickpeas, rinsed and drained
1/2 cup tomato sauce (I used Goya Spanish style tomato sauce)
1/3 cup white wine (I used chardonnay)
Salt and freshly ground black pepper to taste
Pinch or two of crushed red pepper flakes, to taste
2 tablespoons chopped fresh parsley, plus more for serving

Heat the olive oil in a large skillet over medium heat.  Add the garlic and cook, stirring occasionally, until the garlic is soft and well-browned on all sides, 20-25 minutes.  This part can't be rushed.  I promise that after this step, the rest of the dish comes together quickly.

Meanwhile, cook the pasta until al dente and drain, reserving about a cup of the cooking water.

When the garlic is browned, raise the heat to medium high and add the chickpeas with a sprinkle of salt and pepper.  Cook for 2-3 minutes, then stir in the tomato sauce.  After 2-3 more minutes, add the wine.  Let it bubble away for a minute or so.

Toss the pasta with the sauce, adding pasta water as needed.  Add salt, pepper, and red pepper flakes to taste.  Stir in the parsley and serve hot, topped with a little more parsley.


Yum

Monday, May 20, 2013

Cilantro & Avocado Pesto Pasta Salad


I was planning to make guacamole for my party the other night, but at the last minute, I barely got the last batch of cupcakes into the oven before guests started arriving.  I think the party went fine without it, but I was left with several avocados and a big bunch of cilantro.  I thought about making the guacamole for me and Ben, but after my love affair with this queso, I wasn't in the mood for any more chips.

Then, I thought of a brilliant idea.  Cilantro and avocado pesto!  For pasta salad!  And this dish was born.

I think it's fabulous, and I hope you will, too!  You can make it in twenty minutes and it's the perfect color for a spring lunch or dinner.  You could definitely bring it on a picnic, too!


Ingredients (serves 4):

1 pound pasta (I used cavatappi)
1 cup packed fresh cilantro
1 large avocado, peeled and seeded
Juice of half a lime
4 tablespoons olive oil
4 scallions, sliced
1/2 cup crumbled feta (omit this for a vegan dish--it still tastes great!)
1 cup peas, cooked if frozen (I sauteed mine in a little olive oil for 5 minutes)
Salt and pepper to taste
More cilantro, scallions, and lime wedges for garnish

Cook the pasta until al dente, then drain and run under cold water.

To make the pesto, blend the cilantro, avocado, and lime juice in a food processor.  With the motor running, add the olive oil in a steady stream and process until smooth.

Toss the cooked pasta, pesto, scallions, feta, and peas together.  Garnish with additional cilantro and scallions and/or a lime wedge (or more feta--I was out).  Serve chilled or at room temperature.


Yum

Sunday, April 28, 2013

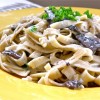
Mushroom and Fontina Pasta


Ever since I saw this post on Brown Eyed Baker, I've been dying to make this recipe.  It did not disappoint.  Yet another fabulous grown-up version of macaroni and cheese!

Fontina is one of my favorite cheeses because it melts so well (the package I got even said "Swedish-style Fontina melting cheese").  This recipe also has lots of mushrooms and shallots, cooked in sherry or wine until they're soft and richly flavored.  This is a quick and delicious dinner that you can easily have on the table in half an hour.  Enjoy!


Ingredients (adapted from Brown Eyed Baker):

4 tablespoons butter, divided
3 portabella mushroom caps, chopped
2 shallots, finely chopped
1/4 cup sherry or dry white wine
12 ounces fettucine or other long pasta (I used Carba-Nada low carb egg fettucine since we're trying to be healthier over here)
8 ounces fontina, cut into small cubes
1/2 cup chopped parsley
Salt and pepper to taste

Heat 2 tablespoons of the butter in a large skillet over medium-high heat.  Add the mushrooms and saute until somewhat softened, about 5 minutes.

Meanwhile, cook the pasta al dente.  Reserve one cup of the cooking liquid when you drain the pasta.

Add the shallots to the skillet with the mushrooms and cook for another five minutes.  Add the sherry or wine, and cook until the liquid is reduced by half.  Pour in the pasta cooking water and bring to a boil.  Stir in the rest of the butter, then lower the heat and stir in the cheese, pasta, and parsley.  Season with salt and pepper to taste.

Yum

Friday, April 12, 2013

Pasta with Goat Cheese and Caramelized Garlic and Onions

image


So, last week I made a caramelized onion risotto that I read about on A Bitchin’ Kitchen.  It was delicious, but not very photogenic.  All I had was red onions, and those are just a fifty bad shades of gray when caramelized.  But, it got me thinking about how I should do more with caramelized onions.  And I decided to throw some garlic in there, too, because I believe everything is better with garlic.  Plus garlic gets nutty and sweet when it’s cooked long enough, and I love that.  The dish had to be pasta, because I don’t like rice that much.  And what else could I think of to make the dish fabulous?  Goat cheese, of course!  Only the best cheese ever.  I threw in some green peas for another sweet flavor, and to add some color to the dish.  I hope you like it!
Ingredients (serves 2-4):
3 tablespoons olive oil
2 yellow onions, halved through the core and thinly sliced
6 cloves garlic, sliced into slivers
1 cup frozen green peas
1 pound penne or other pasta
2 ounces goat cheese, plus extra for serving
1/2 cup freshly grated parmesan cheese
3 tablespoons milk or cream
Salt and pepper to taste
image
Heat the olive oil in a large skillet over medium-high heat.  When it is hot, add the garlic and onion and sprinkle some salt on top.  Leave them alone for a few minutes to get the browning process started.  Then, cook, adjusting the heat as necessary to prevent burning, stirring occasionally, until the onions and garlic are a rich golden brown, about 25 minutes.  Add the peas and cook for another five or so minutes, until the peas are bright green and tender.
image


Meanwhile, cook the pasta al dente and reserve one cup of the cooking water.  Combine the pasta, vegetables, goat cheese, parmesan, and cream or milk.  Toss to combine, and season to taste with salt and pepper.  If the pasta seems too dry, add some of the pasta cooking water until it looks just like you like it. Top with additional crumbled goat cheese and serve hot.
image


Yum

Tuesday, April 9, 2013

Paccheri with Braised Chicken and Saffron Cream


The other day, I went to my mom’s place to visit her and the cats.  My mom is always trying to get me to go through the boxes of books and other junk that I still have at her apartment.  We found a box I’d sent to myself via media mail when I moved back up from Texas, and I hadn’t even opened it yet.  Turns out it was full of old issues of Bon Appétit magazine.  I had a friend coming for dinner yesterday and had promised to make some sort of pasta with chicken.  I flipped through the magazine with that in mind, and found this recipe (my recipe is adapted from the September 2010 issue and can be seen online here).  I knew right away that I had to make it, because I love paccheri.  It’s like rigatoni on steroids.  

Somehow I think the pasta tastes even better because it is bigger.  I buy paccheri at Whole Foods, but if you can’t find it you can order it online at markethallfoods.com.  You could substitute rigatoni, but I think it would take a lot of the fun out of this dish.  

This dish takes a little bit of time to make, but it’s very satisfying once you’re done.  Braising chicken thighs and then shredding the meat makes the chicken very tender and flavorful.  If I made this again, though, I would add some cheese.  I think a bit of freshly grated Parmigiano Reggiano can only make things better.  Let me know if you try it!

Ingredients (serves 4):
           
            3 tablespoons olive oil
            Salt and pepper
            2.5 pounds bone-in chicken thighs, with skin
            2 yellow onions, chopped
            6 cloves garlic, minced
            2 cups dry white wine (I used Chardonnay)
            1 teaspoon crushed saffron threads
            2 cups chicken stock
            1 cup light cream
            1 tablespoon lemon juice, plus extra to taste
            1 pound paccheri
            ½ cup chopped fresh basil, plus extra
            ½ cup freshly grated parmesan cheese


Heat the olive oil in a heavy skillet over medium-high heat.  Salt and pepper the chicken on both sides.  Add the chicken to the skillet and cook until golden on both sides, about 15 minutes total.  Remove the chicken to a plate.

Add the garlic and onion to the same skillet, and cook until softened somewhat, 5-10 minutes.  Add the wine and saffron, bring to a boil, and continue to boil until reduced by about half and thickened.  Add the chicken broth, return the chicken to the pan, and bring to a boil again.  Once the mixture boils, turn the heat down to low and cover the pan.  Simmer for about an hour, until chicken is very tender, turning once about halfway through.
Set the chicken aside to cool.  Boil salted water for the pasta and cook until al dente.  Drain and set aside.

When the chicken has cooled somewhat, remove the skin and bones and shred the meat into small pieces (this is easiest to do by hand).

Skim excess fat off the top of the skillet.  Add the cream and boil until the sauce thickens enough to coat the back of a spoon.  Add lemon juice and chicken.  Cook until heated throughout.  Taste and add more salt, pepper, and lemon juice if desired.  Add pasta and stir in basil and parmesan, if using.  Garnish with additional basil and parmesan and serve hot.
Yum

Monday, April 1, 2013

Pasta with Shrimp and Garlic Tomato Cream Sacue


For my entire childhood, all I ate was macaroni and cheese.  My repertoire gradually expanded to include other foods with cheese, such as grilled cheese, cheese pizza, and broccoli with cheese. While I now eat almost anything, there is still a special place in my heart/stomach (those two are pretty much the same thing for me) for pasta with cheese.  Now I like to add a few other ingredients in to make things more interesting.  This is my current favorite. It’s pretty easy to make and delicious to eat the next day for lunch, too.

Ingredients (serves 3-4):

3 tablespoons olive oil
10-20 cloves of garlic, crushed
1 28 oz. can whole, peeled tomatoes
Salt and pepper to taste
1 pound penne or other pasta
1 pound raw shrimp, peeled and deveined
2 cups fresh baby spinach
3 tablespoons light cream
1/3 cup freshly grated Parmesan cheese, plus extra for serving
Warm the olive oil in a heavy skillet over medium-low heat.  Add the crushed garlic and cook, stirring occasionally, until golden brown. (Note: to crush garlic easily, I place 2 or 3 cloves at a time under a chef’s knife turned so the blade is parallel to the cutting board, then push down on the flat top of the knife with the heel of my hand).

Drain and chop the tomatoes.  Turn the heat to medium-high and add the tomatoes to the skillet with the garlic, sprinkling with salt and pepper to taste.  Cook until the sauce thickens and comes together some, about 10 minutes.  Remove the skillet from the heat and cool slightly, then process the sauce until smooth in a food processor or blender.  (If you prefer a chunky sauce, you can skip this step).


Return the processed sauce to the skillet over medium-high heat, and add the shrimp.  Let them cook for about 3 minutes until pink on the bottom, then flip to cook the other side.  After a minute or two, add the spinach.  Toss gently until the shrimp are opaque throughout and the spinach is wilted.  Stir in the cream and remove from the heat. 
When the pasta is done, combine it with the shrimp, sauce, spinach, and parmesan.  Add the cooking water if the sauce seems too dry.  Season with salt and pepper to taste, and serve with additional parmesan sprinkled on top.


Yum