Showing posts with label lemon. Show all posts

Monday, September 14, 2015

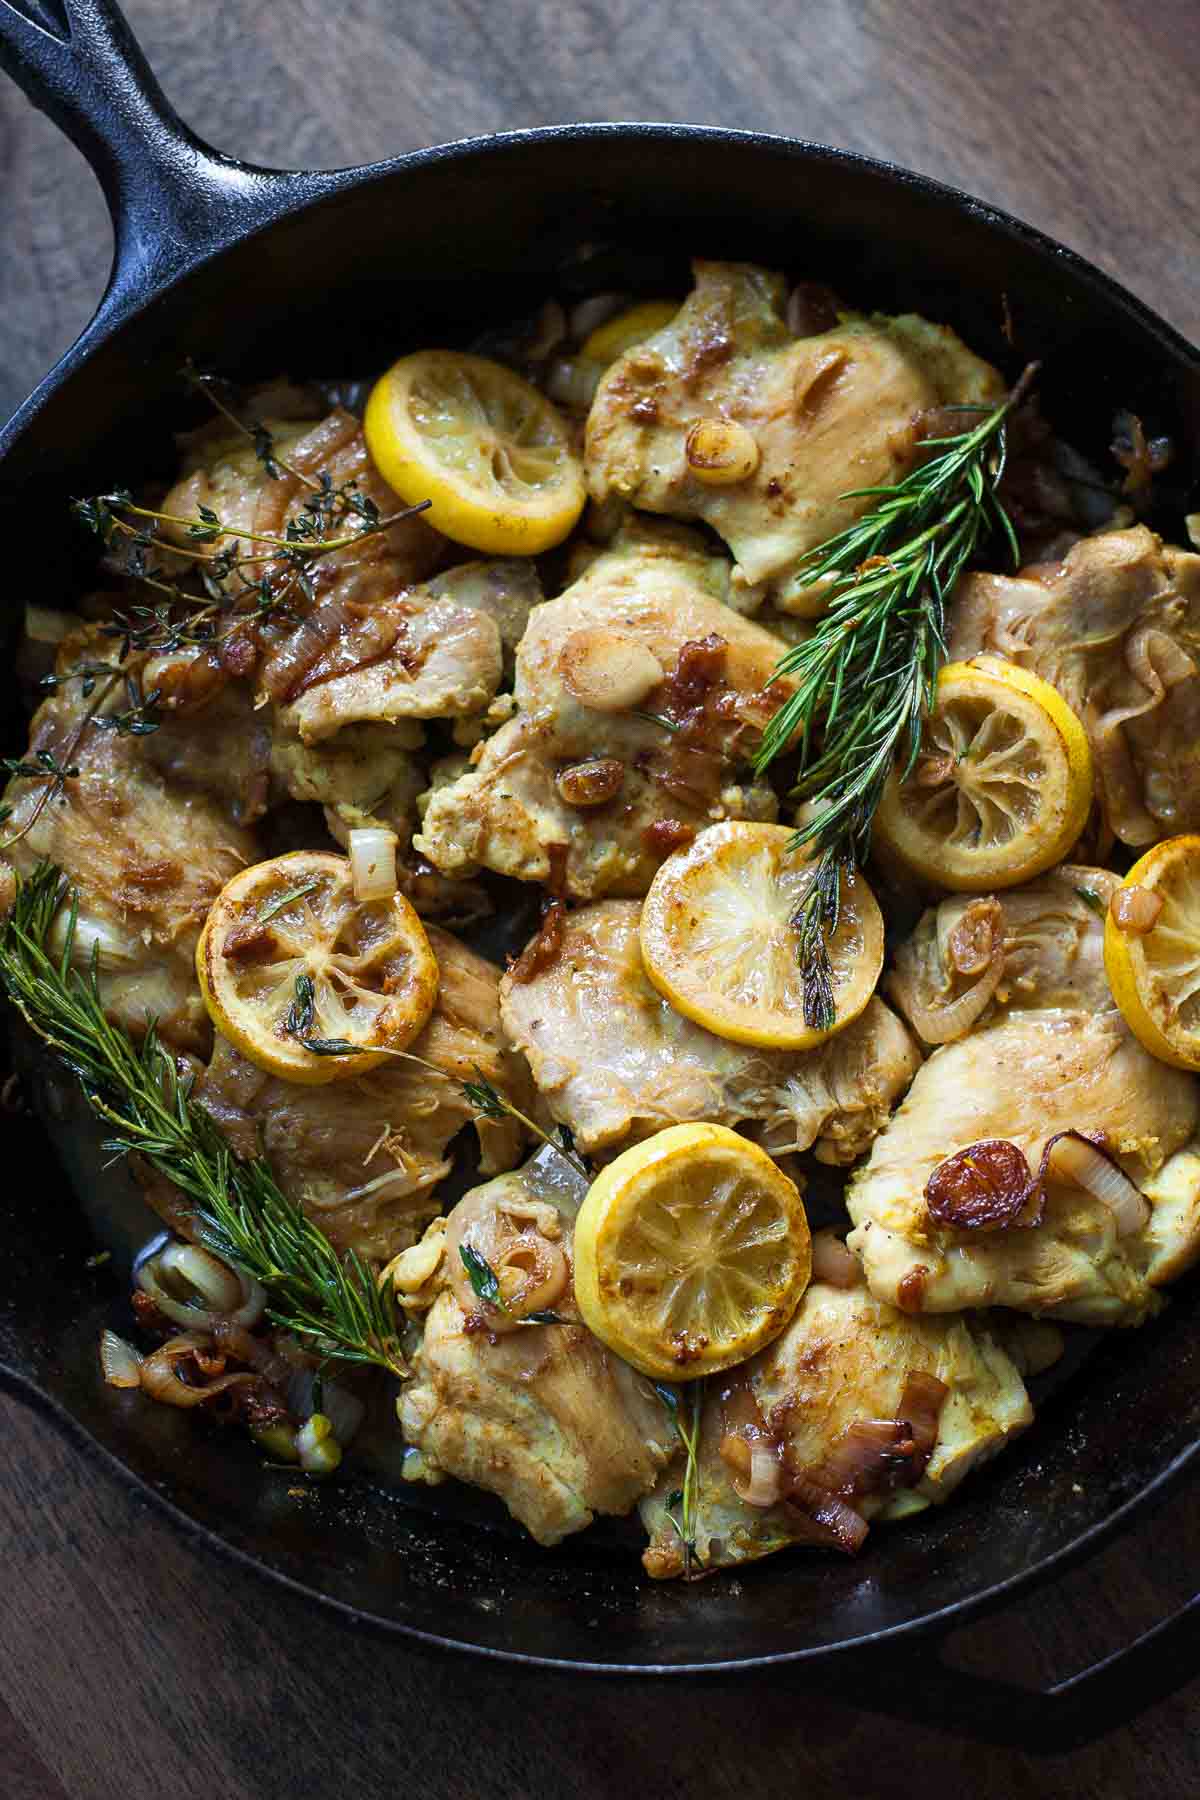
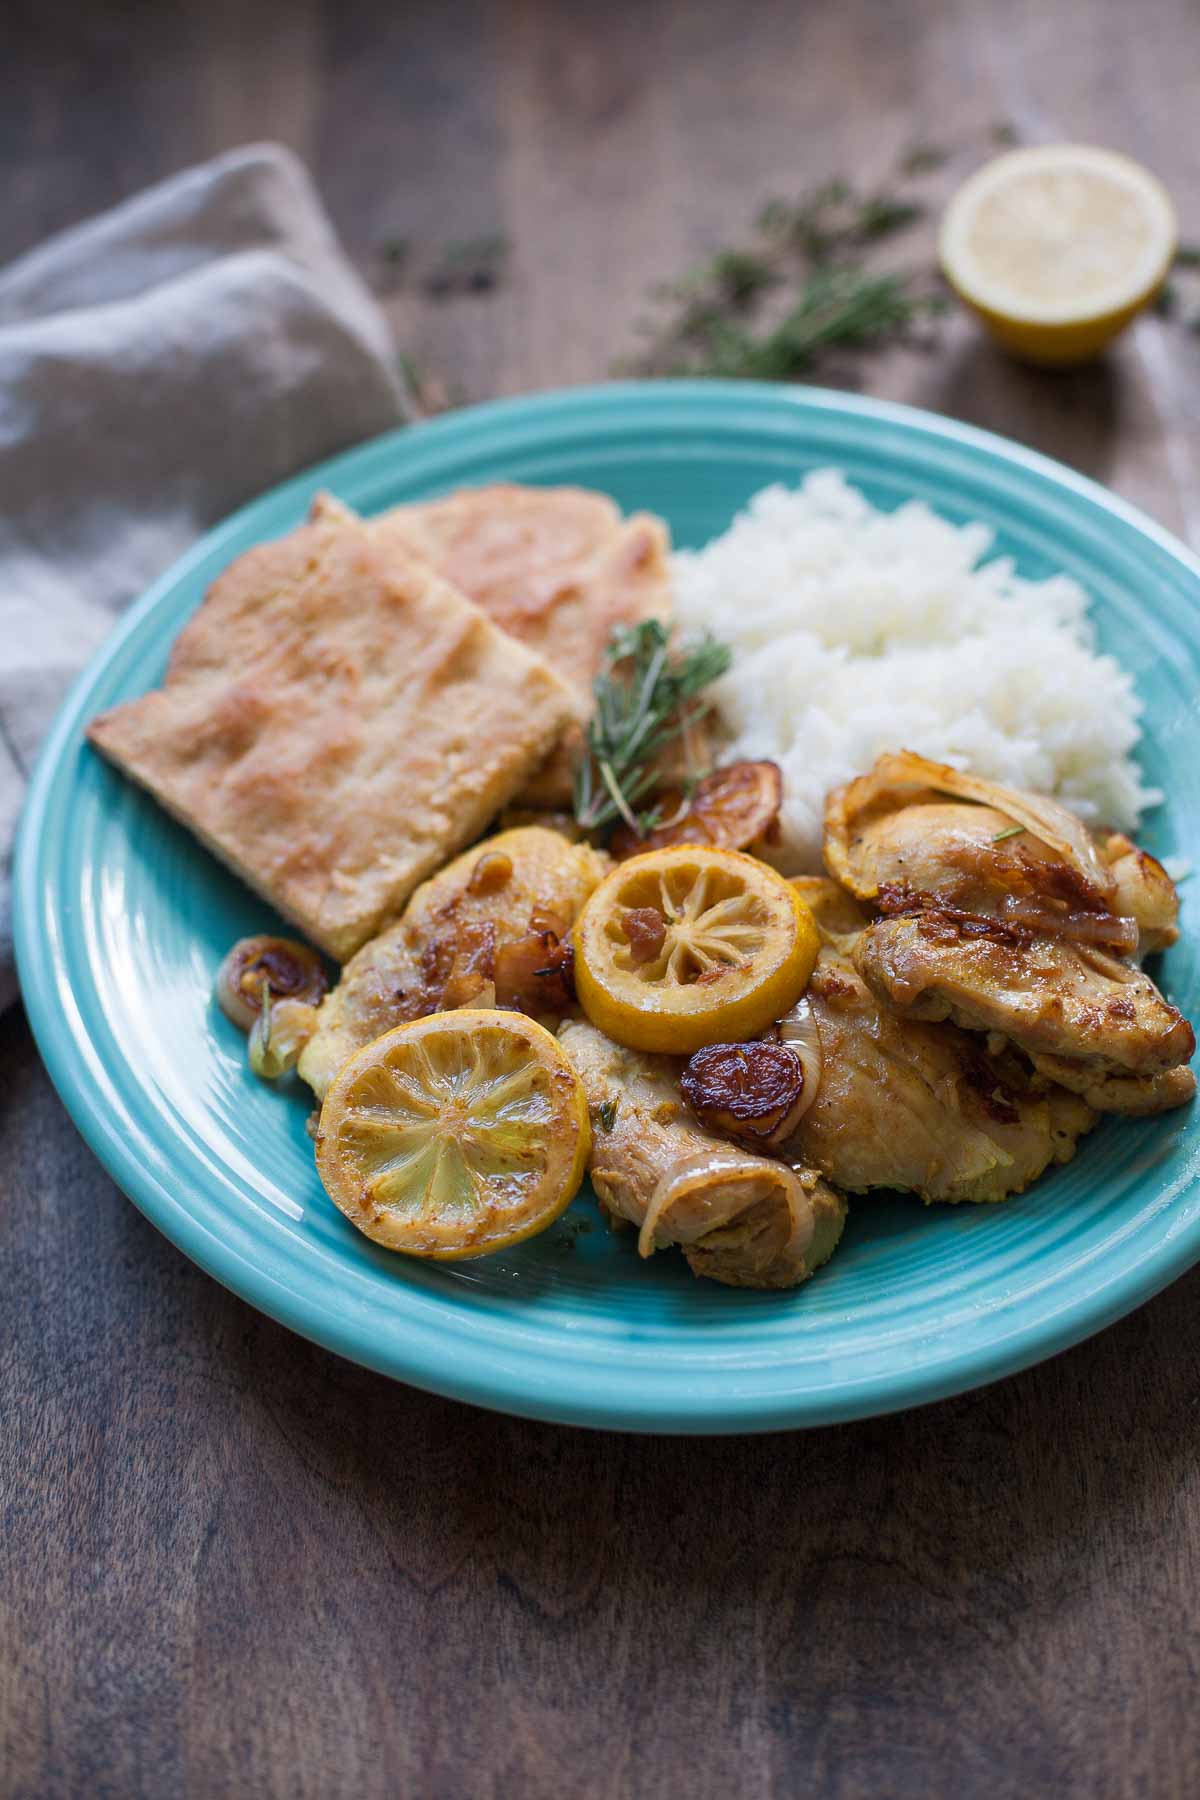
Lebanese Lemon Chicken #30MinuteMondays

Lebanese Lemon Chicken #30MinuteMondays | acalculatedwhisk.com
Fast and flavorful Lebanese lemon chicken with shallots, fresh herbs, 
and a touch of turmeric--a comforting paleo dinner for fall.

There was a touch of fall in the air this weekend, especially in the early mornings. So, even though the highs will be in the 80s all next week, I've decided it's time for fall comfort food. And this Lebanese lemon chicken fits the bill exactly. The flavors of lemon, rosemary and thyme hint at cooler weather, but the dish is fast enough not to heat up your entire house if the temperatures outside are still hot.

Lebanese Lemon Chicken #30MinuteMondays | acalculatedwhisk.com

This recipe is inspired by the Lebanese chicken dish I had for lunch from the hot bar at Whole Foods last week. I don't do well if I grocery shop hungry, so when I arrive at the store not totally full, I get something to eat from the prepared foods section and sit down and eat it before doing my shopping. Whole Foods' version of this dish was made with bone-in, skin-on chicken, and also had potatoes, olives, and a few other ingredients. I loved the overall taste of the recipe, but wanted to simplify it a little.

Yum

Thursday, March 19, 2015

Pan-Seared Salmon with Capers and Baby Artichokes

Pan-Seared Salmon with Capers and Baby Artichokes | acalculatedwhisk.com  A delicious paleo meal that takes less than 30 minutes to make!
Were you a picky eater as a kid? I was pretty much the worst. The only vegetable I would eat was broccoli, and it had to have cheese on top. Everything else I deigned to consume was white or golden brown in color: chicken fingers, macaroni and cheese, grilled cheese, french fries, and pizza without tomato sauce (read: dough with cheese). I wanted slices of American cheese melted on top of almost all my food. It was actually called "Becky cheese" over at my dad's, where no one else ate it.

I remained picky through high school, when I invented a white pizza with broccoli and two kinds of cheese at my favorite local pizzeria. My friends and I called it "Becky pizza", and it was fabulous (I still think something like it should be added to the menu).

Pan-Seared Salmon with Capers and Baby Artichokes | acalculatedwhisk.com  A delicious paleo meal that takes less than 30 minutes to make!

I'm proud to say that things have really changed. Today I'll try almost anything, and there are very few foods I don't enjoy. However, until a couple of months ago, salmon was still on my "no" list. I found it too fishy, and something about its orange-pink hue didn't sit well with me.

Recently I worked on a project where I had to make several salmon recipes. To my surprise, I ended up loving them! The key for me is to really crisp up the skin (and brown the other side as well) and serve the salmon with a flavorful sauce.

Yum

Friday, March 13, 2015

Crispy Chicken with Spring Vegetables

Crispy Chicken with Spring Vegetables | acalculatedwhisk.com

Remember when Dorothy threw a bucket of water on the Wicked Witch of the West? And the witch screamed in agony: "I'm melting! Melting! Oh, what a world!" 

As I walked to the train station yesterday afternoon, I could almost hear my city's dirty snow screaming the exact same thing. Boston is not free of snow yet, but we sure have a lot less of it.

Crispy Chicken with Spring Vegetables | acalculatedwhisk.com

The thaw seemed like my cue to start celebrating spring in the kitchen by making a dish with bright green veggies. For the protein I went with crispy chicken thighs, because truly crispy chicken skin is the best thing ever. Ben only likes skin-on chicken when it's as crunchy as possible and not moist at all, so I practiced and practiced and now have my routine for chicken-crisping down pat.

Here's how you do it: sear the chicken skin side down in a very hot skillet for a little longer than it seems like you should, and then flip it over and finish it in a 450 degree oven. While the chicken roasts, you'll have just enough time to fry some bacon and chop your veggies. Then, while the chicken rests, the vegetables cook in the fat from the chicken infused with a bit of lemon.

Yum

Sunday, November 30, 2014

Ginger Thyme Tea

Feeling under the weather?  Try this simple ginger thyme tea! acalculatedwhisk.com

I woke up Thanksgiving morning with the beginnings of a cold. Black Friday was even worse, with the irrepressible urge to nap setting in a mere three hours after I woke up. Yesterday, after getting over ten hours of sleep the night before, I spent the hours between six and eight pm dozing off on the couch with a purring cat on my stomach and a scarf wrapped around my head. I've gone through two pocket packs of tissues and finally had to cave and buy a full-size box.

Since I know a lot of people get sick around the holidays, I thought I'd share my favorite homemade remedy: a simple ginger tea.

Yum

Tuesday, August 26, 2014

Balsamic Steak with Fig & Arugula Salad


Do you think beautiful food tastes better? I do.

Of course, every once in a while you come across a beautiful dish, take your first bite, and feel disappointed because it doesn’t taste nearly as good as it looks. In my experience, though, that doesn’t happen much.

More often, a food’s level of beauty and deliciousness are relatively close together, with the gorgeousness boosting the deliciousness up a notch or two (or perhaps vice versa, but I don’t really find that a food looks prettier once I’ve tried it and know that it’s tasty…we eat with our eyes first, after all). The food looks good, so it tastes even better. I think that’s how it goes with me and figs. Yes, they’re yummy, but most of all, their colors are just so pretty. When I take a bite of fig while looking at the freshly-sliced figs that are still on my plate, the beauty of those figs makes the one in my mouth taste even better.

Yum

Wednesday, May 7, 2014

Braised Chicken with Leeks & Scallions

Braised Chicken with Leeks & Scallions | acalculatedwhisk.com #paleo #glutenfree #grainfree #whole30

Coq au vin is one of my favorite classic French dishes.  Chicken braised slowly in wine of any kind is almost guaranteed to be delicious, and I've made this coq au riesling recipe several times over the past year.  It's become my go-to dish for whenever company is coming.  However, wine is not truly part of a paleo diet, and many people try to avoid all alcohol, even in cooked dishes.  The question on my mind was this: can you make coq au vin without the vin?  Without any wine, is braised chicken still something exceptional?

Braised Chicken with Leeks & Scallions | acalculatedwhisk.com #paleo #glutenfree #grainfree #whole30

You may have guessed that my answer is a resounding yes. This recipe is proof: wine is not necessary for making delicious braised chicken.  In fact, I liked this dish even more than the coq au riesling I've been making, and to me, the chicken and sauce still had all the flavor benefits of dishes made with copious amounts of wine.  I'm eager to see if you agree, so if you try this recipe, please let me know what you think!

Want to know why this recipe is so good, even though there's no wine in it?  My theory is that it's because of the following three reasons.  First, this recipe uses Pure Indian Foods' organic, grassfed ghee.  Ghee is by far my favorite cooking fat, because it has all the delicious flavor of butter paired with the higher smoke point of oil.  In fact, I think ghee tastes even better than butter, and it's also a much healthier choice than canola or vegetable oil.  If you haven't heard me talk about the wonders of ghee, you can read more about what it is and how it's made here.

Yum

Monday, April 14, 2014

Lemon Olive Oil Cake

Lemon Olive Oil Cake (Paleo, Grain-free, Kosher for Passover) acalculatedwhisk.com

Passover starts tonight, and if you have your big seder this evening, I realize I may be getting this dessert idea out too late.  However, it never hurts to have a delicious kosher for Passover snack cake on hand for days 2-8, right?  This cake would also be perfect for Easter--since I celebrate both holidays, I'm planning on making this again next weekend and dressing it up with some eggs and/or bunnies.

This cake is delicious: moist, tender, and perfectly lemony.  I couldn't taste the olive oil, but I think it adds some hard-to-pinpoint depth to the overall flavor of the cake, and it's nice to know you're baking with a healthy, dairy-free cooking fat.  The glaze is cashew-based, but I worked hard to make honey and lemon the prominent flavors, so I think people who don't know cashews are the main ingredient won't be able to figure it out.

Yum

Saturday, February 15, 2014

Lemon Mousse with Raspberry Coulis


We had another snowstorm today.  I was planning to cook something really appropriate for a snowed-in situation, like some sort of stew or casserole that warms you from the inside out, but then I changed my mind. I'm tired of snow food (and, obviously, snow).  I am ready for spring!

When I taught elementary school, I used to read my kids the Frog and Toad books by Arnold Lobel. In one of the stories, around this time of year, Frog's father tells him that spring is just around the corner. Taking his father's statement literally, Frog goes peeking around all sorts of actual corners in search of spring, to no avail. Finally, he pokes his head around the corner of his own house to find his parents planting their garden, birds chirping, and the sun peering out from behind the clouds. In February and March, I feel like Frog in that story. Spring may be just around the corner, but it's really hard to see.

Yum

Saturday, January 11, 2014

Pumpkin Soup with Crispy Shallots (Whole30 Day 11)


My mom got me a sugar pumpkin to use as a centerpiece for Thanksgiving, and it's been cheerfully sitting on my windowsill ever since.  It still looked perfectly fine to me (turns out pumpkins last 8-12 weeks), so the other day I decided to roast it.  If you have a pumpkin kicking around your house, you should, too!  Then you can make this soup.  Roasting is much better than rotting, which is what will happen if you put off roasting your pumpkin for too long.  Why waste a source of delicious food?  While you're at it, roast the seeds, too.  I tossed mine with ghee and sprinkled them with garlic powder, salt, pepper, and sage, and they were amazing!

If you already got rid of all your pumpkins, don't despair.  Canned pumpkin is available in stores year-round, and will work just fine in this recipe.

Pumpkin is great, but the real star of this soup is the humble shallot.  When you fry shallots for a long time over  low heat, they turn a wonderful shade of golden brown and develop an even richer savory flavor.  After that, when you let them dry on paper towels, they crisp up.  Not like potato-chip crispy, but a wonderful kind of chewy-crispy--and they're WAY more delicious than potato chips.  You may want to make extra, because with a little salt sprinkled on top, they're pretty much better than bacon.

Yum

Sunday, January 5, 2014

Cooking with Coconut Oil Review + Pork Chops & Apple Compote (Whole30 Day 5)


When I was offered a review copy of Cooking with Coconut Oil by Elizabeth Nyland of Guilty Kitchen, my answer was a resounding YES!  I am a huge cookbook junkie, and especially like to read books penned by fellow food bloggers.  Also, since I started eating paleo in August, I've loved using coconut oil in the kitchen, and was eager to learn more things I could do with it.  Today I'm sharing my experience cooking & photographing three amazing recipes from the book, and the recipe for Pork Chops with Apple Compote is at the end of this post!

Cooking with Coconut Oil arrived the day before I left to spend the holidays in Tennessee with Ben's family, so I did not get to cook with it right away.  I had plenty of time to page through it, though, bookmarking recipes I wanted to try and craving almost everything pictured in the gorgeous photographs.  This cookbook features a large, full-color photo of every single recipe, which I love.  (Cookbooks that only show pictures of some of their recipes are a huge pet peeve of mine--I never want to make any of the un-pictured recipes!)  The book also has informational sections that cover the health benefits of coconut oil, details about many of the ingredients used in the book, and ten tips for living a paleo lifestyle.  Did you know that the medium-chain-triglycerides in coconut oil improve brain function and can have therapeutic effects on Alzheimer's patients?  Yeah, neither did I!

Yum

Saturday, November 30, 2013

Lemon Sugar Cookies (Vegan, Nut-free)


I was invited to a Hanukah party last night, and needed to bring a dessert that was nut-free and vegan.  I wanted to bring a traditional Hanukah dessert, but soon realized I didn't know of any.  I guess I never really made it past the mountains of latkes at my family's Hanukah celebrations.  A quick search revealed that oily, fried foods like jelly-filled doughnuts are often eaten at Hanukah, but I wasn't about to fry up a big pile of donuts to be eaten hours later.  I also don't really like jelly-filled desserts; I feel that jelly belongs at breakfast.  Since I had dreidel and Star of David cookie cutters, I decided Hanukah sugar cookies would have to be traditional enough.  I also got out my snowman and snowflake cookie cutters, since winter is almost here.

My next task was to find a great vegan cookie recipe.  Since the cookies had to be nut-free, I soon realized it would be very hard to make them gluten-free as well.  So, these cookies are a total gluten bomb.  I promise to be back with more gluten-free eats very soon!

Yum

Thursday, August 8, 2013

Carnitas con huevo


Breakfast is my favorite meal of the day.  I like to start with a hearty, hot, and delicious breakfast--no bowls of cereal, please.  Since I've started my whole30, I've made lots of great egg dishes, but now I'm having a problem.  I'm tired of eggs.

Yum

Sunday, July 28, 2013

Almond Blueberry Pie Bars (Paleo, Gluten-free)


One of my favorite recipes I've blogged about is almond blueberry pie bars.  They are amazing: a rich, buttery crust, a smooth, custardy filling studded with juicy berries, and a crumbly topping with crisp sliced almonds.  When my mom and I were trying to decide what to make to bring to our cousin's wedding, these bars came to mind.  I wondered if we could make a decent paleo version.

Luckily, the answer is yes!  These bars are just as delicious as the original.  They're not exactly the same--this version has a soft buttery crust, whereas the others had a crunchier crust--but you won't find me complaining.  We brought a huge platter of these to the wedding, and they disappeared fast, devoured by gluten free eaters and non-restricted eaters alike.  They are even more amazing with a scoop of vanilla ice cream--I recommend Blue Bell if you can get it.


It was a bit of an adventure baking these bars at my aunt's apartment, because she does not have a real oven!  I was nervous about using her combination (microwave and convection) oven, so I found the manual online and read the instructions carefully.  I found that the bars browned VERY quickly, but were still not done in the center, so I covered them with foil for the rest of the baking time.  You may or may not have that problem in a regular oven.

This was my first time using coconut flour and maple sugar, and I think they both worked very well in these bars.  The coconut flour is very fine and created a nice smooth crust in combination with the almond flour.  The maple sugar is granulated, so I didn't have to worry about adjusting the proportions of ingredients in order to use a liquid sweetener.  You won't taste any more than a very faint tinge of maple flavor, and that's really only if you're looking for it.  Enjoy!


Ingredients (adapted from Annie's Eats; makes 36 small but thick bars):

For the crust and topping:

1 and 1/2 cups coconut flour
1 and 3/4 cups plus 2 tablespoons almond flour
1 cup plus 2 tablespoons maple sugar (granulated)
1/4 teaspoon salt
Zest of one lemon
18 tablespoons grass-fed cold butter
1 cup sliced almonds, lightly crushed

For the filling:

4 eggs
1 cup grass-fed milk or coconut milk
1 and 3/4 cup maple sugar
1/2 cup coconut flour
Juice of one lemon
1 and 1/2 teaspoons vanilla
3 and 1/2 cups fresh blueberries

Preheat the oven to 350.  Line a 9x13 pan with tinfoil and grease it lightly.  To make the crust, combine the flours, sugar, salt, and lemon zest in a food processor (or by hand in a large bowl).  Cut the butter into cubes and pulse until the mixture is uniform.  If you're not using the food processor, it's easiest to mix the dough with your hands.  Reserve about 3/4 cup of the mixture to serve as the topping.  Press the rest of it into an even layer in the bottom of the pan.  Bake for about 12 minutes, until golden brown.

To make the topping, add the crushed sliced almonds to the reserved dough and mix until combined.

To make the filling, whisk together all ingredients except the blueberries until smooth.  Gently stir in the blueberries.

When the crust is baked, let it cool for 10-15 minutes, leaving the oven on.  Then, pour the filling over, sprinkle the topping evenly over the filling, and bake for about 45 minutes, until the top is golden brown and the middle is just set.  Cool completely before cutting--it helps to put them in the refrigerator to firm up.  Slice into squares or rectangles and enjoy!


You might also like:

Salted Maple Caramel Peach Bars (Gluten free, paleo)


Banana Blueberry Muffins (Gluten free, paleo)


Tasty Food Photography eBook

Yum

Tuesday, July 16, 2013

Lemon Blackberry Cupcakes


Blackberries are one of my favorite fruits.  They are juicier than raspberries, and seem more elegant, perhaps because of their sleek purple-black color.  So, I was really excited to discover that blackberries were this month's ingredient for the Get Your Chef On challenge hosted by White Lights on Wednesday and Four Marrs and One Venus.

I knew I wanted to make a delicious blackberry dessert.  At first I was thinking about blackberry galettes, but I just made galettes recently, and I realized it had been TOO LONG since I'd made cupcakes.  Initially I was planning to make chocolate blackberry cupcakes, but I was over at my mom's, and she really wanted vanilla.  Since she was nice enough to let me heat up her kitchen on a hot day, I had to agree.  Since the blackberries I've been getting are so sweet and juicy, I decided lemons would be a nice counterpoint.

This cake is adapted from a lemon bundt cake recipe in Cook's Illustrated The Science of Good Cooking, which is an awesome book with recipes that were rigorously tested to make the most of the scientific principles at work in the kitchen.  The blackberry frosting is my own creation.

There was almost a disaster when I was decorating these cupcakes.  I thought glaze with frosting on top would be delicious (and I was right), but I didn't realize the frosting would try to slide right off the glaze.  Disaster was averted when I cut little cone-shaped holes into the top of the cupcakes to hold all the buttery frosting.  Phew, that was a close one.

These cupcakes take a little bit of time, but you should make them because they are so summery and so delicious--creamy, buttery, fruity, and tart at the same time.  If you buy a lot of blackberries, which you should, hang on to some--I have another delicious, but much healthier, blackberry recipe coming up soon. 


Ingredients (makes 12 cupcakes; cake and glaze adapted from Cook's Illustrated The Science of Good Cooking):

For the cake:

1 lemon
1 1/2 cups flour
1/2 teaspoon baking powder
1/4 teaspoon baking soda
1/2 teaspoon salt
Scant 1/2 cup buttermilk
1/2 teaspoon vanilla
2 eggs, at room temperature
9 tablespoons unsalted butter, softened but still cool (60 degrees)
1 cup sugar

For the glaze:

1 tablespoon lemon juice
1 tablespoon buttermilk
1 cup powdered sugar, sifted
1/2 teaspoon vanilla

For the frosting:

1 heaping cup fresh blackberries, plus 12 blackberries for decorating
1/4 cup water
2 tablespoons granulated sugar
1 teaspoon vanilla, divided
1 teaspoon lemon zest
12 tablespoons unsalted butter, softened
1/4 teaspoon salt
2 cups powdered sugar, sifted


To make the cake, preheat the oven to 350 and grease and flour a 12-cup muffin tin (or use papers--I didn't because I knew the glaze was going to drip down the sides).

Zest the lemon and squeeze one tablespoon plus 1 teaspoon of juice (save the rest of the lemon for the glaze).  Put half the zest in a small bowl with the juice, reserving the rest of the zest for the frosting.

In a medium bowl, whisk together the flour, salt, baking soda, and baking powder.  In another medium bowl, whisk together the buttermilk, vanilla, and lemon mixture.

In the bowl of a stand mixer fitted with the paddle attachment, cream the butter and sugar on high speed until very fluffy and light (take a full 3 minutes to do this).  Scrape down the sides of the bowl.  With the mixer on low, add the eggs one at a time, mixing to fully combine between the additions.

With the mixer still on low, add the flour mixture in 3 additions, alternating with 2 additions of the buttermilk mixture and scraping down the bowl as needed.  Give the batter one more stir by hand to make sure it's mixed.

Divide the batter evenly among the muffin cups, being careful not to fill them over 3/4 of the way full--without cupcake papers, it's hard to remove a cupcakes that's baked over the edges of the cup.

Bake for 12-18 minutes, or until the cupcakes are light golden around the edges and a toothpick comes out clean.  Cool for five minutes in the pan, then turn out onto a rack, using a small sharp knife to loosen the cakes if necessary.

While the cupcakes are baking, make the glaze.  Combine all the ingredients and whisk until smooth.

While the cupcakes are still warm, pierce the top once or twice with a fork and pour the glaze over.

To make the frosting, heat the blackberries, water, granulated sugar, half a teaspoon of vanilla, and the remaining lemon zest in a saucepan over medium heat.  Simmer, using a spoon to help break up the blackberries, until the berries are turned to mush and the liquid around them is syrupy, 15-20 minutes.  Strain through a fine-mesh strainer, using the back of the spoon to squeeze out as much liquid as possible.  Discard the seedy pulp and set the blackberry syrup aside to cool.

In the bowl of a stand mixer fitted with a paddle attachment, cream the butter until smooth.  Add the blackberry syrup, powdered sugar, salt, and the remaining half teaspoon of vanilla.  Mix until smooth.  If the frosting seems too liquid, put it in the refrigerator for half an hour or so to set up.

When the cupcakes are completely cool, use a paring knife to cut a small cone-shaped piece of cake out of the top of each one (see a picture in this post).  You're doing this because you don't want the frosting to just slide right off the glaze!  Use a spoon or a frosting bag to fill the cavity with frosting, letting it spill over a little.  Place a blackberry, stem end down, in the cavity with the frosting.  Enjoy!

I kept these cupcakes in the refrigerator because it's been so hot and I didn't want the frosting to melt.  They still tasted great on the third day, and there were none left after that.  They will also keep up to 3 days in an airtight container at room temperature.  The cakes texture becomes denser over time (like a pound cake), but it's still delicious.


You might also like:


Yum

Wednesday, July 10, 2013

Lemon Coconut Vegan Ice Cream in a Cinnamon Sugar Bowl


I've been seeing a lot of ice cream recipes made with coconut milk lately, and I wanted to try one myself.  I love coconut milk, and I also like to create vegan treats that I can potentially share with my sister, who can't have any dairy (although I have to admit, she didn't get any of this ice cream--but now that I know how to do it I'll be able to make some just for her).

I'd also been wanting to try the lemon ice cream recipe from Jeni's Splendid Ice Creams at Home.  I like the idea of lemon ice cream because I love lemon, but I hate sorbet.  For me, sorbet is such a copout.  I've never eaten a sorbet without wishing with every spoonful that I were eating ice cream instead.

So, good news!  Vegans and people who can't eat dairy can still have fabulously creamy ice cream.  Coconut milk is so amazing here.  The main flavor is lemon, but there is a subtle coconut flavor.  But the main reason coconut milk is such a star is that it makes this ice cream just as rich and creamy as its from-a-cow counterpart.  Even if you can eat dairy, you should still try this!  If you stock your pantry with lots of coconut milk, you can be ready to make this pretty much anytime.  I can't wait to try the coconut milk ice cream base with other flavors.  All I did to make this recipe vegan was omit the cream cheese from Jeni's recipe, substitute light coconut milk for the whole milk and regular coconut milk for the cream, and add a little vanilla (I have to have a little vanilla in pretty much all my desserts--it rounds out the flavors).  The results are super delicious.


Oh, and the bowl!  I was going to just serve this ice cream in a regular bowl, until I saw this brilliant idea over at Two Peas & Their Pod (a fabulous blog that I highly recommend).  All I did was swap coconut oil for the butter in Maria's recipe, and I got this fabulous vegan cinnamon sugar ice cream bowl.  The flour tortillas I buy (Maria & Ricardo's) are certified vegan; check yours just to make sure.  This bowl takes the dessert over the top because it's like eating your ice cream inside a big crunchy piece of cinnamon toast.  It's also so easy to make that I may never serve ice cream in a real bowl ever again.

Ingredients for the ice cream (makes one quart; adapted from Jeni's Splendid Ice Creams at Home):

1 tablespoon plus 1 teaspoon cornstarch
2 lemons
1 14-ounce can coconut milk
1 14-ounce can light coconut milk
2/3 cup sugar (use vegan sugar to make the recipe vegan) plus 2 tablespoons, divided
2 tablespoons light corn syrup
Pinch of salt
1/2 teaspoon vanilla extract
Lemon sugar for serving (optional)

In a small bowl, combine the cornstarch and a couple of tablespoons of the light coconut milk to make a smooth paste.

Use a vegetable peeler to zest the lemons, making long strips of zest.

In a medium saucepan, stir together the remaining light coconut milk, the regular coconut milk, 2/3 cup of the sugar, and the corn syrup, lemon zest, and salt.  Bring to a boil over medium high heat and boil for four minutes.  Remove from the heat and stir in the cornstarch mixture.  Return to a boil and cook for 1 minute or so, stirring, until thickened.

Remove the mixture from the heat and chill in the refrigerator or freezer until completely cold.

Meanwhile, roll the lemons under the heel of your hand to prime them to release more juice.  Juice the lemons (you want about half a cup of juice).  Heat the lemon juice with the remaining two tablespoons of sugar, stirring until the sugar is dissolved.  Refrigerate the syrup until cold.

When the ice cream mixture is chilled, pour it through a strainer into your ice cream maker.  While the machine is spinning, pour in the lemon syrup.  Once the ice cream is ready, freeze in an airtight container for at least three hours before serving.

If you want to add a little crunch and make your ice cream extra fabulous, serve it sprinkled with some lemon sugar.  Just grate some lemon zest and mix it with a little granulated sugar.  Yum!


Ingredients for the cinnamon sugar bowls (adapted from Two Peas & Their Pod):

For each bowl:

1 flour tortilla
2 teaspoons coconut oil
2 teaspoons sugar
1/2 teaspoon cinnamon

Preheat your oven to 350.  Lightly grease one small ramekin (1 cup capacity) or ovenproof bowl for each bowl you want to make.

Spread 1 teaspoon or so of coconut oil on each side of the tortilla.  Mix the cinnamon and sugar together, and sprinkle evenly over both sides of the tortilla.  Carefully place the tortilla in the ramekin, folding it as necessary to help it form a cup.

Bake for about 10 minutes, until browned and crisped on top.  Cool completely before filling with ice cream.  Cinnamon sugar bowls can be stored at room temperature in an airtight container for up to two days.


Yum

Tuesday, July 9, 2013

Lemon Cheesecake Truffles

***Note: The recipe below is NOT paleo--it was published before I discovered the paleo diet!  However, you can see an index of all my paleo recipes here.  Thank you for stopping by!*** 


Truffles are the perfect summer dessert, especially when there's lemon involved.  You can make these without even using your stove, and since they're kept in the fridge, they're refreshing on a hot day.  These truffles have a rich and creamy cheesecake interior with lemony undertones, a snappy chocolate shell, and crunchy, zesty lemon sugar on top.  They are so rich that I feel satisfied with just one or two for dessert.

You should make these because they are much easier, cuter, and smaller than cheesecake.  You can impress your friends by presenting all the delicious flavors of cheesecake in a small, round, chocolate-dipped form.  And in case you're wondering, lemon and chocolate DO go together well.  It's like orange and chocolate, but punchier and more summery.  Try it.  Try it today!


Ingredients (makes about 15 truffles):

For the cheesecake filling:

1 lemon
8 ounces cream cheese
Pinch of salt
1 cup powdered sugar
A few drops of vanilla

For the topping:

3 tablespoons granulated sugar

For the chocolate coating:

7 ounces bittersweet chocolate, chopped
1/2 teaspoon vegetable oil
A few drops of vanilla

Zest the lemon.  Set aside half the zest and toss it to coat with the granulated sugar to make the topping.  Spread the lemon sugar out on a plate in a thin layer so it can dry out a little.  You definitely don't want to skip this part, because the crunchy, zesty sugar is going to take these truffles from delicious to ridiculous.

Place the other half of the zest in a medium bowl with the cream cheese, salt, sugar, and vanilla.  Juice the lemon to obtain three tablespoons of juice, and add them to the bowl, making sure to strain out any seeds.  Use a fork to cream this mixture until well combined.  Cover the mixture and place it in the freezer for half an hour or so to firm up.

Line a baking sheet with parchment or wax paper.  Use a spoon and your fingers to form rounded teaspoon-sized balls of cheesecake mixture and place them on the parchment-lined cookie sheet.  Don't worry if the balls aren't perfect, because you will have a chance to smooth them out later.  Freeze the balls for at least two hours so they're totally firm.

When your truffles are almost frozen, it's time to melt the chocolate.  Place the chopped chocolate, oil, and vanilla in a microwaveable bowl.  The oil is just there to help make the chocolate coating a little bit shiny.  Microwave the bowl in thirty-second intervals, stirring in between, until almost melted.  Stir until the chocolate is completely smooth.  Set the chocolate aside to cool for a few minutes before you dip your truffles.

Line another baking sheet with parchment or wax paper so you'll have a spot for your dipped truffles.  Take the truffles out of the freezer.  Working with one ball at a time, roll it quickly between your palms to round it out, then drop it in the chocolate, turning it a little to fully coat it.  Use a fork to carefully fish the truffle out of the chocolate.  Let the excess chocolate drip off, then carefully transfer the truffle to the parchment paper.  Sprinkle the top of the truffle with a little lemon sugar right away.  You don't want to wait until you've dipped all the truffles because once the chocolate is hardened the lemon sugar won't stick.

Once you've dipped all the truffles, place the baking sheet in the refrigerator for about half an hour so the chocolate can set.  When the truffles are set, they are ready to eat.  If you won't be enjoying them right away, store the truffles in an airtight container in the refrigerator for up to a week.


Yum

Tuesday, June 25, 2013

Lighter Lemon Curd (Dairy-Free)


My dad and sister came over for dinner this weekend.  It was so much fun--my sister just turned 15, and she had never been to my apartment before!  I cooked them a belated birthday/father's day celebratory dinner.  We had thai shrimp curry with vegetables and coconut milk (so good--recipe coming soon), a salad my dad brought with a delicious dressing (I'll try to score the recipe and post it--it involves hazelnut oil!) and a berry tart with coconut cream and lemon curd.  My sister can't eat any dairy, so I had to make lemon curd without the butter.  Good news--it's just as delicious as the original, and even more lemony.  

I wanted to share the whole tart recipe with you, but the crust still needs some work.  Anyone have a good dairy-free tart crust recipe?  I'm going to work on getting one ready for the Fourth, because this tart happens to be very patriotic.  For the topping, we just whipped up some coconut cream with powdered sugar and vanilla, then folded it in to the lemon curd.


Anyway, I couldn't wait to share this delicious lightened-up lemon curd with you.  It's a healthier way to enjoy my favorite spread!  Try it on pancakes or a dutch baby, swirl it with some greek yogurt, or pipe it inside some cupcakes.

If you're looking for the original buttery version, it's here.

Ingredients (adapted from food.com; makes about 1 1/2 cups):

4-6 organic lemons
1/2-3/4 cup sugar, to taste
Pinch of salt
2 eggs
1 egg yolk
1/2 teaspoon vanilla (optional)

Wash your lemons really well, and zest two of them.  Mix the zest with the sugar in a small bowl, rubbing the mixture between your fingers to bring out the flavors of the zest (use 1/2 cup of sugar for a very puckery curd, and more if you want things a little sweeter).  Set the lemon sugar aside (if you want to make extra lemon sugar, it's also delicious as a topping for muffins or cookies).


Roll the lemons firmly under the palm of your hand to prime them to release the most juice.  Juice lemons until you have 3/4 cup of lemon juice.  Strain out any seeds.  Add the juice, lemon sugar, and salt to a saucepan.  Warm over medium heat, stirring constantly, until all the sugar is dissolved.

Beat the eggs and egg yolk together in a medium bowl.  While whisking constantly, slowly pour the warm lemon mixture into the eggs.  Continue to beat for a minute or so.

Return the mixture to the saucepan and cook over low heat, whisking constantly, until the mixture thickens, about 10-15 minutes.  Remove from the heat and stir in the vanilla (the vanilla is optional--you won't really taste it, but it rounds out the flavor).

Let the curd cool to room temperature, then transfer to a glass jar or another airtight container.  Store in the refrigerator.  Lemon curd will keep, refrigerated, for at least two weeks.


Yum