Showing posts with label ice cream. Show all posts

Saturday, August 15, 2015

No-Churn Mocha Ice Cream

No-Churn Mocha Ice Cream (sweetened with maple syrup) | acalculatedwhisk.com

So, have you made Nigella Lawson's no-churn coffee ice cream? It's ridiculously easy and delicious, and when I discovered how simple it was to make really good ice cream with just a mixer, I was tempted to get rid of my ice cream machine!

To make the no-churn ice cream, you beat heavy cream, sweetened condensed milk, and flavorings until it's nice and thick, then freeze the ice cream. That's all there is to it! The only thing is that I'm not a big fan of cooking with sweetened condensed milk--there's so much refined sugar in it, and I try to avoid that whenever I can.

No-Churn Mocha Ice Cream (sweetened with maple syrup) | acalculatedwhisk.com

So I decided to try making my own sweetened condensed milk using maple syrup, with some guidance from this recipe from Gluten-Free on a Shoestring. The homemade sweetened condensed milk takes a while to make, but your house will smell amazing. You do have to watch it pretty closely but don't have to stir it constantly, so it's a good time to do some cleaning or other tasks around the kitchen. I got a lot of dishes done while I was making it! (Anything that gets me to do more dishes is good, and pretty rare.)

The results are so much more delicious than canned sweetened condensed milk! The maple flavor adds a caramel note to the ice cream that goes perfectly with the chocolate and coffee. In addition to working beautifully in this ice cream, the maple-sweetened condensed milk is amazing in hot or iced coffee.

Yum

Saturday, May 30, 2015

Blueberry Buttermilk Ice Cream

Blueberry Buttermilk Ice Cream | acalculatedwhisk.com @beckywink

The past couple of weeks have been a whirlwind. Last weekend I went to an amazing food photography and styling workshop in Plymouth, MA (more on that here), yesterday I took the comprehensive exams for my master's program, and somewhere in there I turned 30.

I actually love birthdays (especially mine), and so far I am feeling good about being 30. Ben's birthday is just a week and a half before mine, so we celebrated with a joint make-your-own ice cream sandwich party. It's hard to imagine anything more fun than smooshing ice cream between cookies with your closest friends!

Blueberry Buttermilk Ice Cream | acalculatedwhisk.com @beckywink

This ice cream was not present at the party because it hadn't occurred to me yet--I was actually inspired to make this because of all the leftover buttermilk I had after making Ben's birthday cake. (He always wants a gluten cake for his big day, and who am I to deny a birthday boy? It's the only glutinous baking I do all year. I made him this chocolate cake and it was fabulous. The only change I made was using avocado oil instead of canola. The avocado oil is tasteless and worked great in the cake!)

For the party I made a classic vanilla ice cream in my ice cream maker and Nigella Lawson's no-churn coffee ice cream. If you don't have an ice cream maker (or even if you do!) you HAVE to try this no-churn business. I was blown away by the awesome, creamy texture and how easy it was to make. (It is, however, less healthy than what I normally make due to copious amounts of sweetened condensed milk. Worth it for a special occasion, though!)

Yum

Monday, April 20, 2015

Matcha Avocado Ice Cream

Matcha Avocado Ice Cream | acalculatedwhisk.com

I'm working with high school students this semester, and on Mondays we have great chats about our weekends. I always feel like a boring, lame adult because every time they're like, "What did you do this weekend?" I'm like, "Oh, I did a lot of cooking, and only a little bit of cleaning." Welcome to my life.

I was excited last Monday because I felt like it sounded a lot cooler to say I made ice cream. Cooler both literally and figuratively, I suppose.

Matcha Avocado Ice Cream | acalculatedwhisk.com

Of course, they wanted to know what flavor, and I wish you could have seen the looks on their faces when they found out I put avocado in my ice cream. They didn't know what matcha was, and that part kind of flew under the radar--everyone was really stuck on the avocado.

You know what, though? It's not weird at all. I knew I wanted to make a matcha ice cream (because matcha in all the things feels like spring to me), and I decided to throw in an avocado because green tea and avocado are spring-green-colored soul sisters. The finished product doesn't taste like avocado, but has an added richness and health boost thanks to that sneaky addition.

Yum

Tuesday, July 8, 2014

Mocha Pistachio Ice Cream (Dairy Free, Coconut Free)

Mocha Pistachio Ice Cream (Dairy Free, Coconut Free) | acalculatedwhisk.com

Sadly, it turns out that I'm allergic to coconut.

This is especially devastating because coconut is the miracle food source of the paleo world.  Coconut milk, sugar, flour, oil, and butter are all delicious, and do an impressive job of standing in for their non-paleo counterparts.  

I can't help but wonder if my sudden increase in coconut intake during my January Whole30 was what caused my allergy to surface.  But, no matter the cause, I won't be partaking in any coconut anytime soon.  Eating raw coconut makes me feel awful, and my doctor told me not to eat cooked coconut either unless I first sit through a challenge test in his office.  The test would consist of me bringing in some food with cooked coconut in it, eating it one bite at a time, and seeing if I go into anaphylactic shock or anything.  I told him no thanks for now.

Yum

Tuesday, September 17, 2013

Pumpkin Spice Ice Cream (Vegan, Paleo, Gluten-free)


Did you know there was once a molasses flood in Boston?  A five-story high molasses tank exploded on an unusually hot day in 1919 and surged through the North End, destroying a fire station and leaving a path of sticky destruction in its wake.  Some say that when the weather is really warm, you can still smell the molasses on the city streets almost 100 years later.

I was fascinated by the molasses flood as a kid and did a report on it in elementary school.  I think that was the last time I thought about molasses, though, because I almost never cook with it.  But, while making a failed batch of pumpkin bread over the weekend, I ran out of honey and needed another sweetener.  The molasses in the back of my cupboard seemed like just the thing, and it was (the pumpkin bread only failed because I asked Ben to watch it for me, and it ended up baking for almost three hours).  Molasses has a spicy flavor that goes really well with pumpkin, and contributes to this ice cream's rich orange color.  I did a little research and there seems to be some debate as to whether molasses is truly paleo, but I'm sure that this ice cream would still be delicious if you added more honey instead, or even tried maple syrup.

Yum

Saturday, July 20, 2013

Strawberry Ice Cream (Paleo, Vegan)


Okay guys, so technically when you go paleo, you are supposed to be really hard core for 30 days.  You are not just supposed to jump into making a million and one paleo desserts.  You are not supposed to have any desserts at all for that first month.  But, BUT...I just had to make one last dessert.  It's what I do.  And it's really good.  You'll understand when you taste it!

This ice cream is made with coconut milk and sweetened with honey (or maple syrup or agave for a vegan version).  The strawberry syrup has a little balsamic vinegar in it, just to deepen the flavor.  Don't worry, you won't taste it.  You can hardly even taste the honey and coconut--this is mainly just strawberries and cream flavored.  It's fabulous, and there's nothing bad or unnatural in it.


Ingredients (makes about a quart):

For the strawberry syrup:

2 cups fresh strawberries
1 tablespoon honey, agave, or maple syrup
3 tablespoons water
1 scant tablespoon balsamic vinegar
Pinch of salt

For the ice cream base:

1 (14 ounce) can coconut milk
1 (14 ounce) can light coconut milk
1/2 cup honey, agave, or maple syrup (or to taste)
1 teaspoon vanilla

To make the strawberry syrup, hull and halve the strawberries.  Place them in a saucepan over medium heat with the remaining ingredients and cook, stirring often, until the strawberries have softened and are starting to break up (about 10 minutes).  Cool slightly, then transfer to a food processor.  Blend until smooth, and strain through a fine mesh sieve to remove the seeds, pressing on the pulp to extract as much liquid as possible.  Discard pulp and refrigerate syrup until cold.

To make the ice cream, whisk together all the ice cream base ingredients in a large bowl until smooth.  Whisk in the cold strawberry syrup, taste, and adjust the sweetness as desired.  Refrigerate until chilled, and freeze according to your ice cream maker's instructions.  Store in an airtight container in the freezer for at least 3 hours before serving.


You might also like:


Yum

Wednesday, July 10, 2013

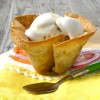
Lemon Coconut Vegan Ice Cream in a Cinnamon Sugar Bowl


I've been seeing a lot of ice cream recipes made with coconut milk lately, and I wanted to try one myself.  I love coconut milk, and I also like to create vegan treats that I can potentially share with my sister, who can't have any dairy (although I have to admit, she didn't get any of this ice cream--but now that I know how to do it I'll be able to make some just for her).

I'd also been wanting to try the lemon ice cream recipe from Jeni's Splendid Ice Creams at Home.  I like the idea of lemon ice cream because I love lemon, but I hate sorbet.  For me, sorbet is such a copout.  I've never eaten a sorbet without wishing with every spoonful that I were eating ice cream instead.

So, good news!  Vegans and people who can't eat dairy can still have fabulously creamy ice cream.  Coconut milk is so amazing here.  The main flavor is lemon, but there is a subtle coconut flavor.  But the main reason coconut milk is such a star is that it makes this ice cream just as rich and creamy as its from-a-cow counterpart.  Even if you can eat dairy, you should still try this!  If you stock your pantry with lots of coconut milk, you can be ready to make this pretty much anytime.  I can't wait to try the coconut milk ice cream base with other flavors.  All I did to make this recipe vegan was omit the cream cheese from Jeni's recipe, substitute light coconut milk for the whole milk and regular coconut milk for the cream, and add a little vanilla (I have to have a little vanilla in pretty much all my desserts--it rounds out the flavors).  The results are super delicious.


Oh, and the bowl!  I was going to just serve this ice cream in a regular bowl, until I saw this brilliant idea over at Two Peas & Their Pod (a fabulous blog that I highly recommend).  All I did was swap coconut oil for the butter in Maria's recipe, and I got this fabulous vegan cinnamon sugar ice cream bowl.  The flour tortillas I buy (Maria & Ricardo's) are certified vegan; check yours just to make sure.  This bowl takes the dessert over the top because it's like eating your ice cream inside a big crunchy piece of cinnamon toast.  It's also so easy to make that I may never serve ice cream in a real bowl ever again.

Ingredients for the ice cream (makes one quart; adapted from Jeni's Splendid Ice Creams at Home):

1 tablespoon plus 1 teaspoon cornstarch
2 lemons
1 14-ounce can coconut milk
1 14-ounce can light coconut milk
2/3 cup sugar (use vegan sugar to make the recipe vegan) plus 2 tablespoons, divided
2 tablespoons light corn syrup
Pinch of salt
1/2 teaspoon vanilla extract
Lemon sugar for serving (optional)

In a small bowl, combine the cornstarch and a couple of tablespoons of the light coconut milk to make a smooth paste.

Use a vegetable peeler to zest the lemons, making long strips of zest.

In a medium saucepan, stir together the remaining light coconut milk, the regular coconut milk, 2/3 cup of the sugar, and the corn syrup, lemon zest, and salt.  Bring to a boil over medium high heat and boil for four minutes.  Remove from the heat and stir in the cornstarch mixture.  Return to a boil and cook for 1 minute or so, stirring, until thickened.

Remove the mixture from the heat and chill in the refrigerator or freezer until completely cold.

Meanwhile, roll the lemons under the heel of your hand to prime them to release more juice.  Juice the lemons (you want about half a cup of juice).  Heat the lemon juice with the remaining two tablespoons of sugar, stirring until the sugar is dissolved.  Refrigerate the syrup until cold.

When the ice cream mixture is chilled, pour it through a strainer into your ice cream maker.  While the machine is spinning, pour in the lemon syrup.  Once the ice cream is ready, freeze in an airtight container for at least three hours before serving.

If you want to add a little crunch and make your ice cream extra fabulous, serve it sprinkled with some lemon sugar.  Just grate some lemon zest and mix it with a little granulated sugar.  Yum!


Ingredients for the cinnamon sugar bowls (adapted from Two Peas & Their Pod):

For each bowl:

1 flour tortilla
2 teaspoons coconut oil
2 teaspoons sugar
1/2 teaspoon cinnamon

Preheat your oven to 350.  Lightly grease one small ramekin (1 cup capacity) or ovenproof bowl for each bowl you want to make.

Spread 1 teaspoon or so of coconut oil on each side of the tortilla.  Mix the cinnamon and sugar together, and sprinkle evenly over both sides of the tortilla.  Carefully place the tortilla in the ramekin, folding it as necessary to help it form a cup.

Bake for about 10 minutes, until browned and crisped on top.  Cool completely before filling with ice cream.  Cinnamon sugar bowls can be stored at room temperature in an airtight container for up to two days.


Yum

Sunday, July 7, 2013

Mint Chocolate Chip Ice Cream with Homemade Magic Shell


Several weeks ago, I made mint chocolate chip ice cream.  It's Ben's favorite flavor, and I really like it, too.  It was late at night when it was ready to eat, so we had some, and the next day I asked Ben not to finish it while I was at work so I could get some pictures later.

Well, guess who conveniently forgot about what I said?  It's all worked out pretty well for him, though, because I just had to go ahead and make more mint chocolate chip ice cream.


It's also working out pretty well for me, because I just got my hands on a copy of Jeni's Splendid Ice Creams at Home.  It's my kind of book!  It has so many delicious and creative ice cream recipes, organized by season.  And, it has lots of recipes for sauces, mix-ins, and sundaes.  It even has a recipe for macaron ice creams sandwiches.  I love it!

Jeni's ice cream base has a few interesting ingredients (cream cheese and cornstarch, for example), but they result in an ice cream that stays creamy and scoopable day after day.  You have to try this!


Ingredients (makes one quart; adapted from Jeni's Splendid Ice Creams at Home):

For the ice cream:

1 tablespoon plus 1 teaspoon cornstarch
3 tablespoons cream cheese, softened
1/ 4 teaspoon salt
2 cups whole milk
1 1/4 cups heavy cream
2/3 cup sugar
2 tablespoons light corn syrup
Handful of fresh mint leaves, torn into pieces
1/4 teaspoon vanilla
3 tablespoons green creme de menthe (optional)

For the chocolate chips and magic shell:

7 ounces bittersweet chocolate, chopped
3 tablespoons coconut oil
1/4 teaspoon vanilla


In a small bowl, stir together the cornstarch and two tablespoons of the milk to form a smooth paste.

In a medium bowl, whisk the cream cheese and salt until smooth.

Heat the cream, remaining milk, sugar, and corn syrup in a saucepan over medium heat.  Bring it to a boil, and boil for four minutes.  Remove from the heat, and gradually mix in the cornstarch paste.  Return the mixture to a boil and cook for about a minute, stirring, until somewhat thickened.

Slowly pour the hot milk mixture into the bowl with the cream cheese, whisking until smooth.  Stir in the vanilla, creme de menthe if using, and mint leaves. (If you decide not to use the creme de menthe, your ice cream won't be green.  You can always add food coloring if you want.)

Refrigerate the mixture for at least four hours to chill and infuse the milk with minty flavor.  When ready to freeze the ice cream, strain out the mint and freeze in your ice cream maker.

To make the chocolate chips and magic shell, heat the coconut oil and chocolate in a double boiler, stirring until melted and smooth.  Stir in the vanilla.  Cool to room temperature before layering with the ice cream.

When the ice cream is done, put a thin layer of chocolate in the bottom of an airtight container.  Add a layer of ice cream, then drizzle on some chocolate.  Keep layering until the ice cream is all packed up, using just about 2/3 of the chocolate.

Freeze the ice cream for at least four hours before serving.

Magic shell should be liquid at room temperature, but can be microwaved if necessary.  To serve, spoon a little chocolate on top of your ice cream and watch the magic.

Magic shell will keep in the refrigerator for three weeks.

Yum

Thursday, July 4, 2013

Fruit & Frangipane Galettes with Raspberry Swirl Ice Cream


Happy Fourth!  I'm sitting on my couch, listening to all the illegal fireworks popping down on my street, feeling full and happy.  

My mom and my good friend Annetta came over today.  Ben grilled hamburgers, Annetta brought pasta salad, my mom brought brie, and I made red, white, and bleu macaroni and cheese.  The best part was that Annetta came early and helped me make these galettes.  We had so much fun!  Galettes are like pies but easier since you don't have to fit the dough into a pan or trim it or anything.  I actually think they're prettier, too!  These galettes have a layer of delicious frangipane inside, and you can make them with pretty much any kind of fruit.

I made the galette dough and the frangipane last night, so it was easy to roll out the dough and assemble the galettes this afternoon.  It's great to be able to prep the components in advance and then throw it all together right before dinner.


Galettes need ice cream on top, at least in the summer.  I was going to just make vanilla bean ice cream, but then I saw the extra raspberry coulis that I made to go with my panna cotta sitting in the fridge.  That stuff was begging to be swirled into the ice cream!  In the end, I think it was the best ice cream I've ever made.  You have to try it!  There wasn't even quite enough raspberry coulis left for my tastes--next time I'm going to put in more.

The galette recipe is adapted from Alexandra Cooks and the ice cream is adapted from David Lebovitz's The Perfect Scoop via Annie's Eats.

Ingredients for the galettes (serves about 8):

Dough (recipe below)
Frangipane (recipe below)
4 small or 2 large stone fruits or 2 cups of berries, or a combination
2 tablespoons melted butter
4 teaspoons sugar


For the galette dough (makes two 9-inch galettes):

2 1/2 cups flour
2 tablespoons sugar
1/2 teaspoon salt
2 sticks (16 tablespoons) butter, cold
1/2 cup plus 2 tablespoons ice water, plus extra if necessary

To make the dough, pulse the flour, sugar, and salt in a food processor until well mixed.  Cut the butter into chunks and add them to the bowl of the food processor.  Process using short pulses until the butter is the size of peas.  Add the ice water and stir with a fork until the dough comes together into a mass, adding more ice water a little at a time if necessary.  Divide the dough into two even balls, flatten slightly, wrap in plastic wrap, and refrigerate until ready to use (dough can be made up to a week ahead).

For the frangipane (makes about a cup; you'll have extra):

1 cup ground almonds (almond flour) and/or pecans (I used a mix of almond flour and pecans I ground in the food processor)
1/4 cup sugar
Pinch of salt
4 tablespoons butter, softened
1 egg
1/4 teaspoon vanilla
1 tablespoon rum, brandy, or bourbon (optional)

Pulse all ingredients in the food processor (bonus: you don't have to wash it out if you just made the dough in it) until smooth.  Store in the refrigerator for up to one week until ready to use.

To assemble the galettes, preheat the oven to 400.   Roll out one piece of dough on a lightly floured surface until it forms an 11-inch circle, adding flour as needed so it doesn't stick.  Transfer the dough to a cookie sheet lined with parchment paper, and refrigerate while you roll out the other piece in the same way.

Switch the cookie sheets so you're working with the chilled circle of dough and the one you just rolled out is in the fridge.  Spread about 1/4 cup of frangipane on the dough, leaving a two inch border around the edge.  If using stone fruits, pit them and slice them 1/2 inch thick.  Layer the fruit on top of the frangipane.  We used 2 plums for one galette and a heaping cup of blueberries for the other.  Moving around the edge of the dough, fold in overlapping segments of dough to encase the filling (it's easy to do because these galettes are supposed to look rustic!).  Refrigerate that galette while you prep the other.

Brush the dough of both galettes with melted butter, and sprinkle about two teaspoons of sugar over the fruit and dough of each galette.  Bake for about 20-30 minutes, until the crust is golden brown on top but not burned on the bottom.  Cool on the cookie sheets for a few minutes, then transfer to a wire rack to cool completely.  Cut into wedges and serve with ice cream on top.


Ingredients for the ice cream (serves 6):

2 cups heavy cream, divided
2/3 cup sugar
Pinch of salt
1 vanilla bean
1 cup milk (I use 2%)
1 teaspoon vanilla extract
1/2 cup raspberry coulis

In a medium saucepan, stir together half the cream with the sugar and salt.  Cut the vanilla bean in half lengthwise, scrape the seeds into the mix, and throw the pod in, too.  Heat over medium heat, stirring often, until the sugar is all dissolved.

Stir in the rest of the cream, the milk, and the vanilla.  Refrigerate the mixture until it's totally chilled (I'm impatient, so I usually stick mine in the freezer for about an hour).  Remove the vanilla bean and freeze in your ice cream maker.

In the bottom of an airtight container (freezing this container beforehand is a nice touch on a hot day), spoon a layer of raspberry coulis.  Top with a layer of ice cream, and continue to layer the coulis and ice cream until they're all packed up.  This will create beautiful raspberry swirls when you scoop your ice cream.  Freeze for at least two hours before serving.


Yum

Monday, July 1, 2013

Double Malt Ice Cream Sandwiches #chocolateparty


Did you ever get a malt cup from an ice cream truck as a kid?  Malt cups were always my favorite.  It's not a bar or anything fancy--just a cup of chocolate malt ice cream that you eat with one of those little spoons.  I've been wanting one forever, so I finally ordered some Milo online and made my own version.  If you like malt, you will LOVE this.

I was just thinking about ice cream, but then I found out that this month's chocolate party secret ingredient was ice cream, and that the recipes had to call for both ice cream AND chocolate (so, not just ice cream with chocolate in it!).  Well, what else was there to do?  I baked up some lightly malted chocolate chip cookies and stuffed the ice cream inside.  These ice cream sandwiches would also be delicious with any other ice cream flavor--feel free to use store bought or your favorite homemade flavor.

P.S.  While you're here, check out this giveaway!  You could win a copy of an awesome food photography e-book.


Ingredients:

For the cookies (from Hummingbird on High's recipe, makes about 24):

1 cup flour
Rounded 1/4 cup Milo
1/2 teaspoon salt
1/2 teaspoon baking powder
1 stick butter (8 tablespoons), at room temperature
1/2 cup brown sugar
1/4 cup white sugar
1 egg, at room temperature
1/2 teaspoon vanilla
1 cup chocolate chips (I used semi-sweet baking melts)

For the ice cream sandwiches (makes 12):

24 cookies
1 quart chocolate malt ice cream (recipe below) or any other ice cream, softened

To make the cookies, preheat the oven to 375 and line two baking sheets with parchment paper.

In a small bowl, whisk together the flour, baking powder, salt, and Milo and set aside.

In a large bowl, cream the butter and two sugars with an electric mixer until light and fluffy.  Add the egg and vanilla, and beat just until combined.

Add the flour mixture to the other ingredients, and mix by hand JUST until combined.  Fold in chocolate chips.

Using a tablespoon measure, spoon out tablespoon-sized balls of dough at least 2 inches apart on the parchment paper.  Bake for about 8 minutes, until cookies are just set and barely beginning to brown around the edges.  Let them cool for a few minutes on the sheet to firm up, then transfer to a wire rack to cool completely.  Once they are cool, stick them in the freezer for an hour or so.  This will make it easier to assemble the ice cream sandwiches.

To make the sandwiches, match the cookies up by size.  Place a scoop of softened ice cream on one frozen cookie (bottom side up), and top with the other cookie, top side up.  Smoosh a little to help the ice cream get to the edges.  Wrap each ice cream sandwich individually and store in the freezer for up to two weeks.  Before serving, let the sandwiches thaw for about five minutes.

Ingredients for the chocolate malt ice cream:

1/2 cup Milo
1/2 cup sugar
3 cups heavy cream, divided
1 1/2 cups 2% milk
1 cup Whoppers, crushed (optional)

In a medium saucepan, combine the Milo, sugar, and half the cream.  Heat over medium heat, stirring constantly, until the sugar and Milo are dissolved and no clumps are left.  Remove from the heat and stir in the remaining cream and the milk.

Chill the mixture completely by refrigerating overnight or placing in the freezer for about an hour.  Once the mixture is totally chilled, freeze it in your ice cream maker.  When the ice cream is almost done, add the Whoppers, if using.  Store in the freezer in an airtight container.


Want to participate in this month's chocolate party by sharing a treat with chocolate and ice cream?  Here's how to participate:

1.) Blog about your chocolate treat. Your recipe must include the two ingredients we choose (chocolate and ice cream for July). It can be a simple no bake treat or a sophisticated layer cake, the complexity level of the recipe is totally up to you.
2.) Include a link back to a monthly round-up or the Chocolate party page. Optional, add the Chocolate Party logo in your blog post or on your sidebar.
3.) Your recipe must be published during the current month. Please do not link old recipes, they will be deleted.
4.)  Add your link below! 


Yum

Friday, June 14, 2013

Brownie Sundae Cupcakes


These cupcakes feature the essential elements of a brownie sundae in a convenient, easy to serve and eat form.  I made them for the kids and they were a big hit at the pajama dance party we had today (we filled the dinosaur jar again).  Some kids were guilty of just licking the ice cream off the top and leaving the brownie, but most of them polished off the whole thing.

You could just make this with your favorite brownie recipe and your favorite homemade or store bought ice cream to save time.  I ended up making my brownies with olive oil because it was the ONLY thing left in my kitchen, but they turned out great!  Nobody noticed anything at all, and I felt a little less guilty about enjoying several of these cupcakes over the last 24 hours.


I got the inspiration and ganache for these from Joy the Baker, modified this ice cream recipe from Annie's Eats, and adapted this brownie recipe from food.com.  I can't wait to make these again with a different flavor of ice cream.  And then maybe with blondies instead of brownies?  The possibilities are endless.  And some whipped cream on top, maybe?  I totally wanted to do that, but all the cream was used up making the ice cream.


Ingredients (makes about 30 brownie cupcakes):

For the brownies:

1/3 cup chocolate chips, melted
1 cup olive oil
2 cups sugar
2 teaspoons vanilla
4 large eggs
1/2 teaspoon baking powder
1/2 teaspoon salt
1 cup flour
2/3 cup cocoa powder

For the vanilla bean ice cream (makes about 2 quarts):

3 cups heavy cream, divided
1 1/2 cups milk (I used 2%)
Pinch of salt
3/4 cup sugar
1 vanilla bean, halved lengthwise
1 1/2 teaspoons vanilla extract

For the ganache:

1 cup chocolate chips
1/3 cup milk or cream
1/2 teaspoon vanilla

To make the ice cream, heat half the cream in a medium saucepan with the salt, sugar, and vanilla bean (scrape in the seeds, then throw the bean in, too).  Stir occasionally until all the sugar has dissolved.  Remove from heat and stir in the remaining milk and cream.  Chill the mixture thoroughly, remove the vanilla bean, then freeze in your ice cream maker.

To make the brownies, preheat the oven to 350 and line 30 muffin cups with paper liners.  Mix together the oil, sugar, and melted chocolate chips in a large bowl.  Stir in the eggs and vanilla.  In a separate bowl, whisk together all the remaining dry ingredients.  Combine the wet and dry ingredients until no floury spots remain.  Divide the batter among the cupcake cups (don't add too much--you want the batter to just cover the bottom of the cupcake paper so you'll have room for the ice cream later).  Bake for 8 or so minutes until set.  It's better to underbake these a little since they'll harden up in the freezer later.  Cool to room temperature, then transfer to the freezer for at least 30 minutes before adding the ice cream.

To make the ganache, set the chocolate chips aside in a bowl and heat the milk or cream until scalded.  Pour it over the chocolate chips, cover, and let sit for a few minutes.  Stir in the vanilla.  If your chocolate isn't totally melted, microwave in 15-second intervals and stir until smooth.  Cool to room temperature before using.

To put the cupcakes together, spoon softened ice cream (right from the machine is perfect) over chilled brownies to fill the cupcake papers.  Freeze cupcakes for at least an hour.  Using a spoon, top each cupcake with a teaspoon or so of ganache.  Store in the freezer, and remove about five minutes before serving.

Yum

Monday, June 3, 2013

Cherry Garcia Frozen Yogurt


When I was a kid and we were getting ice cream, my mom ALWAYS wanted Cherry Garcia.  And I was always like, well, we could get that, OR WE COULD GET OREO!!  I wasn't really a fruit-in-your-ice-cream kind of kid.

Times have changed!  As evidenced by the strawberry ice cream I made last week, I now willingly put fruit into my own ice cream.

So, I've been brainstorming all things chocolate and cherry to get ready for this month's chocolate party.  I wanted to make something fancy.  I was thinking about making a chocolate panna cotta and topping it with a layer of cherry curd and some whipped cream.

But, it's too hot!  I can't even heat up a pot of cream.  Instead I whipped up this super delicious frozen yogurt, which has the benefit of being sort of guilt-free since there's no sugar added.  I'll have to save some for my mom!  I think it's even better than the original.

Ingredients (makes about a quart):

3 cups Greek yogurt (I used Fage Total, but you could try lowfat, too)
3/4 cup milk
1/4 cup cream (or use more milk)
4 tablespoons Agave nectar, or to taste
2 teaspoons stevia, or to taste
1 tablespoon vanilla
2 cups fresh cherries, pitted and chopped
3.5 ounces semisweet chocolate, chopped

Mix the milk and cream in a large bowl, and stir in the stevia until dissolved.  Add the yogurt and vanilla.  Check to see how sweet it is and add agave nectar until it's sweetened to your liking (you could try all agave or all stevia, but stevia sometimes has a funny aftertaste if you use too much of it).

Freeze the mixture in an ice cream maker.  When it's almost done, add the chocolate and cherries and let the machine swirl them in.  Transfer to an airtight container and freeze for 2 hours before serving.


Want to participate in this month's chocolate party by sharing a treat with chocolate and cherries?  Here's how to participate:
1.) Blog about your chocolate treat. Your recipe must include the two ingredients we choose (chocolate and cherries for June). It can be a simple no bake treat or a sophisticated layer cake, the complexity level of the recipe is totally up to you.
2.) Include a link back to a monthly round-up or the Chocolate party page. Optional, add the Chocolate Party logo in your blog post or on your sidebar. 
3.) Your recipe must be published during the current month. Please do not link old recipes, they will be deleted.
4.)  Add your link below! 
Yum

Monday, May 27, 2013

Tipsy Coffee Ice Cream


I'm in love with my new ice cream maker!  It's so easy to use.  I loved the strawberry ice cream I made the other day, and was ready to try again as soon as we finished eating it.  Since the machine was a gift from my mom, I decided to ask her what flavor she wanted, and she said Kahlua.  I convinced her that it would be even better with Jamaican rum cream, since that's what I had.  And I added a little hint of coffee to round out the flavors.  You could probably make this with Kahlua, although it's not creamy like rum cream and Bailey's.  Let me know if you try it!

Anyway, this ice cream was seriously delicious.  My mom and I could not even wait for it to fully freeze before eating all of it (hence the melty pictures, sorry!).  It's different than the strawberry ice cream because it doesn't have an egg custard base, but it was still very creamy.  I didn't miss the eggs at all (plus, I was out).  It also means this ice cream is easier to make!  Win-win-win.

P.S. I store my ice cream in recycled coffee cans.  Not just my coffee ice cream, but it's especially fitting here.  They are a good size, and convenient with the snap-on lids.

Ingredients (adapted from this recipe on Annie's Eats; makes about 3 cups or 6 servings):

1 cup 2% milk
2/3 cup sugar
1 cup whole coffee beans
Pinch of salt
1 3/4 cups heavy cream, divided
1/4 cup rum cream or Irish cream
1/2 teaspoon vanilla
1/4 teaspoon finely ground coffee or espresso powder

Combine the milk, sugar, coffee beans, salt, and 1/2 cup of the cream in a saucepan over medium heat.  Cook, stirring, until the mixture is hot and starting to bubble around the edges.  Turn off the heat and let steep at room temperature for an hour or so.

Strain the coffee mixture into a bowl.  Add the remaining 1 1/4 cups of cream, the rum cream, vanilla, and coffee.  Stir and chill in the refrigerator until completely cold.  Freeze in an ice cream maker and enjoy!

Yum

Sunday, May 26, 2013

Double Strawberry Ice Cream


You may have noticed I am on a bit of a strawberry kick recently (see no-bake strawberry swirl cheesecake bars, strawberry shortcakes with balsamic chocolate glaze, strawberry & cream margaritas, and strawberry curd).  Well, the strawberry love continues.  This is partly because I still have a jar of strawberry curd in my fridge, and am tempted to add it to just about anything.  However, if you don't feel like making strawberry curd (but really, why wouldn't you?  twenty minutes and your strawberries will last for weeks in the fridge in a delicious, spreadable form) you can still make this ice cream.  Just omit the strawberry curd for single strawberry ice cream, or replace it with an equal amount of fresh strawberry puree.


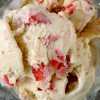
This ice cream is rich and creamy thanks to the vanilla bean, strawberry curd, and custard base.  You have to try it!  It's also a wonderfully pastel shade of pink, my favorite color.


Ingredients (makes 1 1/2 quarts, adapted from Martha Stewart):

8 egg yolks (save the whites for breakfast or meringues)
2/3 cup plus 2 tablespoons sugar, divided
2 cups milk (I used 2%, but Martha calls for skim)
1/4 teaspoon salt
1/2 vanilla bean
1 pound strawberries, hulled and finely chopped
2 cups heavy cream
1/3 cup strawberry curd or fresh strawberry puree

In a saucepan (off the heat for now), combine the egg yolks, 2/3 cup of sugar, and salt.  Gradually whisk in the milk.  Scrape the seeds of half a vanilla bean into the mix, and throw the bean in, too.

Heat the mixture over medium heat and stir constantly with a wooden spoon until thickened, about 10-15 minutes.

Prepare a bowl set oven an ice bath (a larger bowl filled with ice or ice water).  Place a fine-meshed sieve on top.  Pour the thickened custard through the sieve, discarding the vanilla bean.  Stir in the cream and strawberry curd.  Let the mixture chill, stirring occasionally.  When the mixture is cold, I recommend you refrigerate it overnight to make sure it's REALLY chilled.

Mix the chopped strawberries with 2 tablespoons of sugar and set aside.

When the custard mixture is completely chilled, freeze in your ice cream maker.  A few minutes before the ice cream is ready, add in the strawberries.

Transfer to an airtight container and freeze for at least 2 hours before serving.

You can also sandwich some of this between two honey vanilla cookies for the world's best ice cream sandwich!

Yum