Showing posts with label garlic. Show all posts

Monday, August 31, 2015

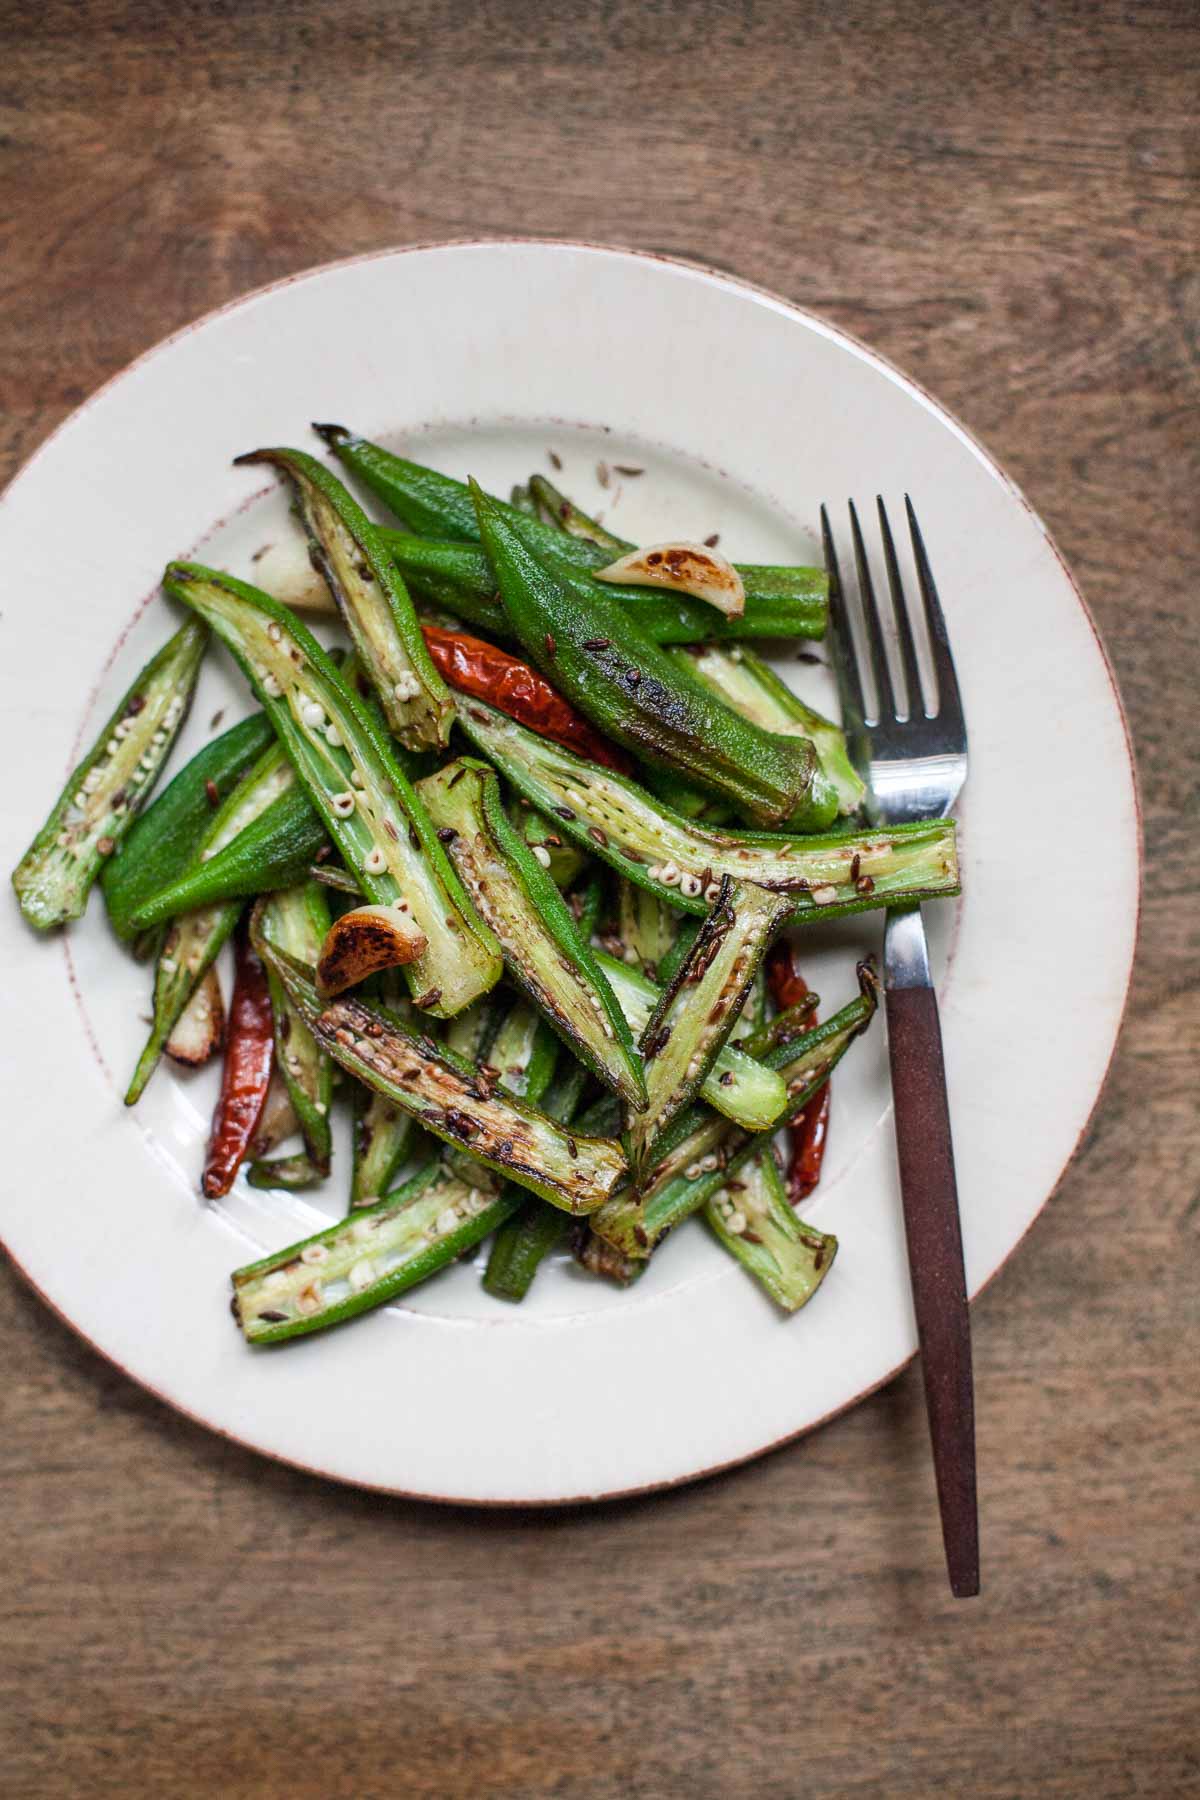
Blistered Okra with Garlic and Cumin #30MinuteMondays

blistered okra with cumin and garlic 1 v3
This blistered okra with garlic and cumin is much healthier than fried okra
 but just as addictive! It's also paleo, gluten-free, and vegan.

How do you feel about okra? I always hated it in gumbo and other gummy preparations as a kid, but quickly fell in love with fried okra. Last year I even made a paleo version of fried okra that's really good, but it's not super quick to make. 

My love for okra eventually expanded to include bhindi masala, an Indian curry where the okra is cooked with plenty of ginger, garlic, onion, and tomato, and there's a recipe for that in my cookbook. While delicious, bhindi masala also takes a little time to make.

Blistered Okra with Garlic and Cumin #30MinuteMondays | acalculatedwhisk.com

When I scored some really beautiful okra at the farmers' market, I wanted to cook it quickly in a way that would highlight its intrinsic flavor while minimizing its intrinsic gumminess. A little research indicated that cooking okra briefly over relatively high heat would be most likely to achieve those results.

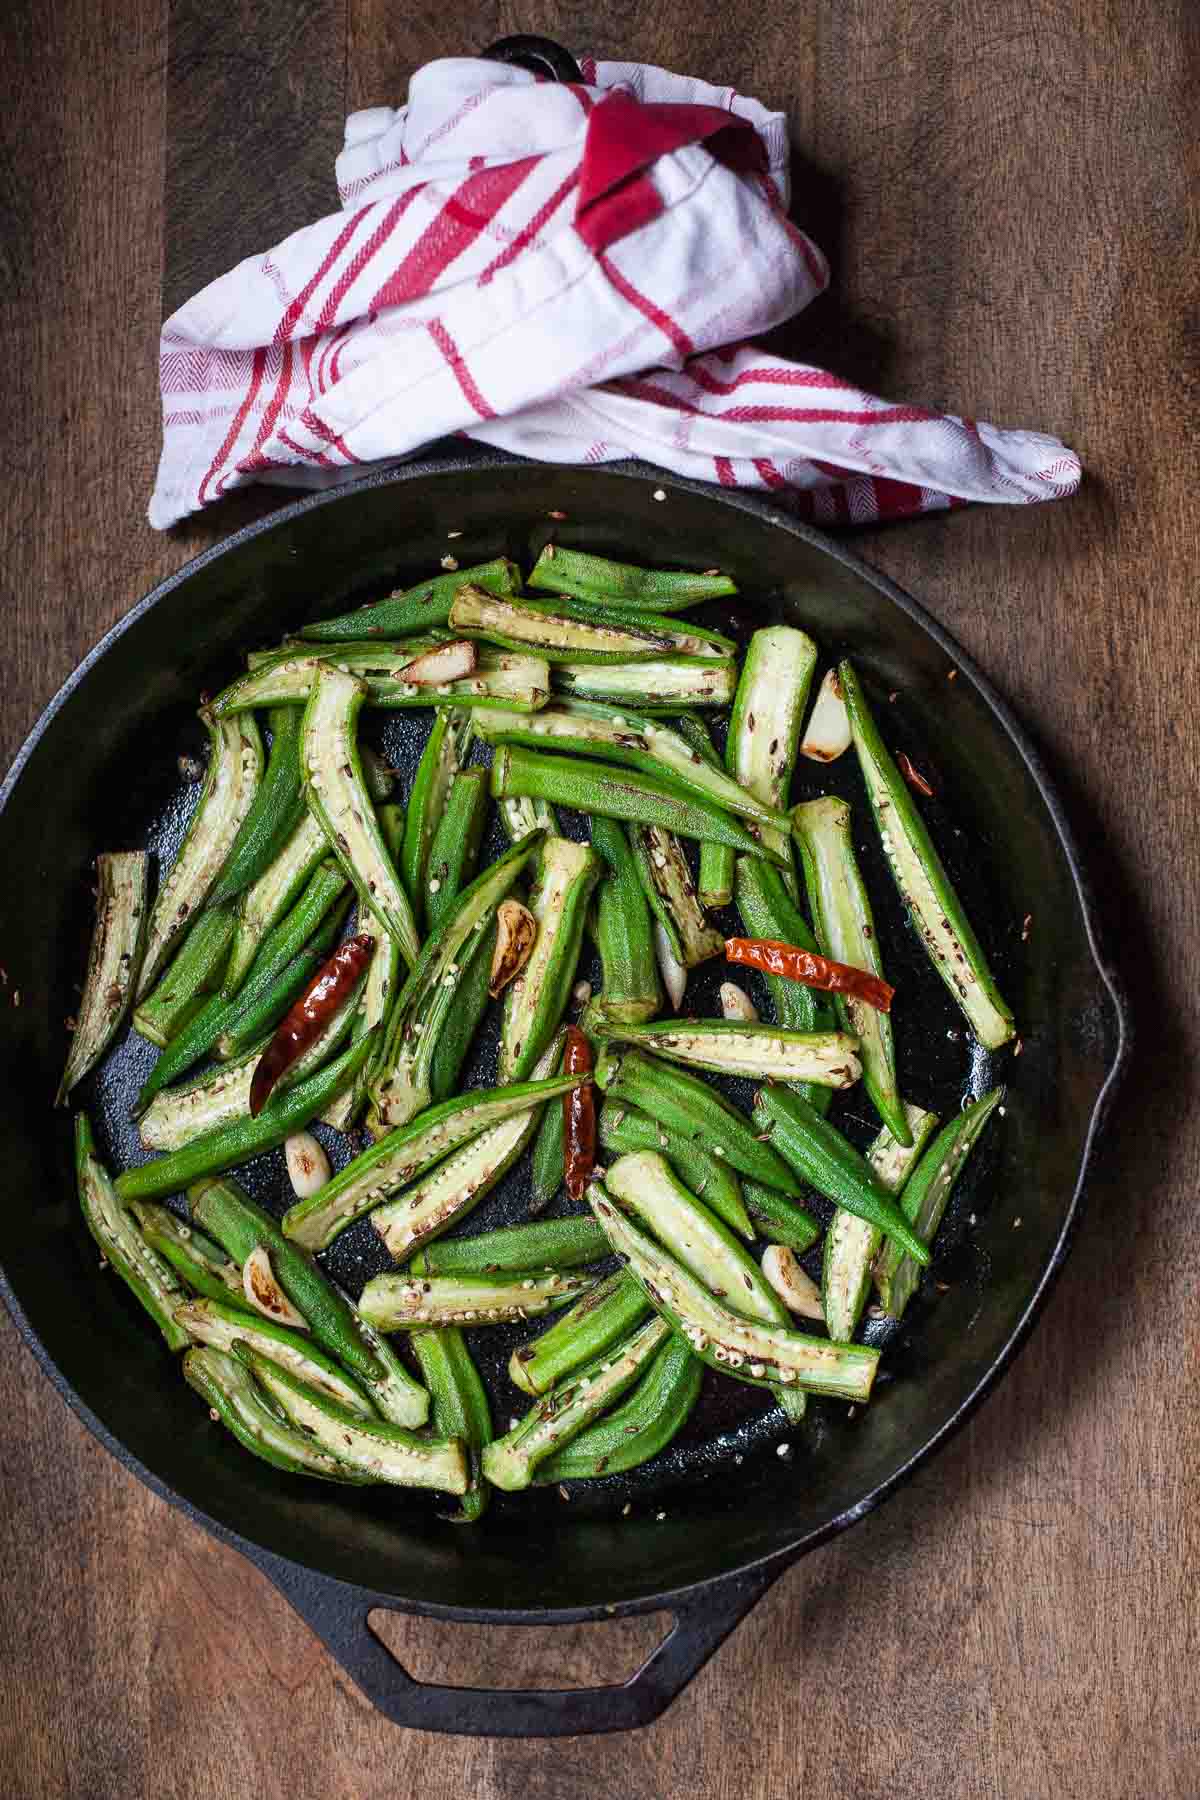
I was so happy with how this recipe turned out! Slicing the okra lengthwise provides a nice surface for browning while preserving the attractive silhouette of the pods. (Did you know okra is also known as lady fingers? Move on over, cookies whose sole purpose is to make tiramisu!) The recipe starts with getting a cast iron skillet nice and hot, then adding butter or oil. Whole cumin seeds, garlic cloves, and dried chiles are added next, infusing the cooking fat with savory and subtly spiced flavor and a gentle, warming heat. The okra are added next and cooked for about ten minutes, turning a few times, until nice and browned. Add a hefty sprinkle of flaky sea salt and that's it! Non-fried okra that you won't be able to stop eating.

Yum

Monday, June 29, 2015

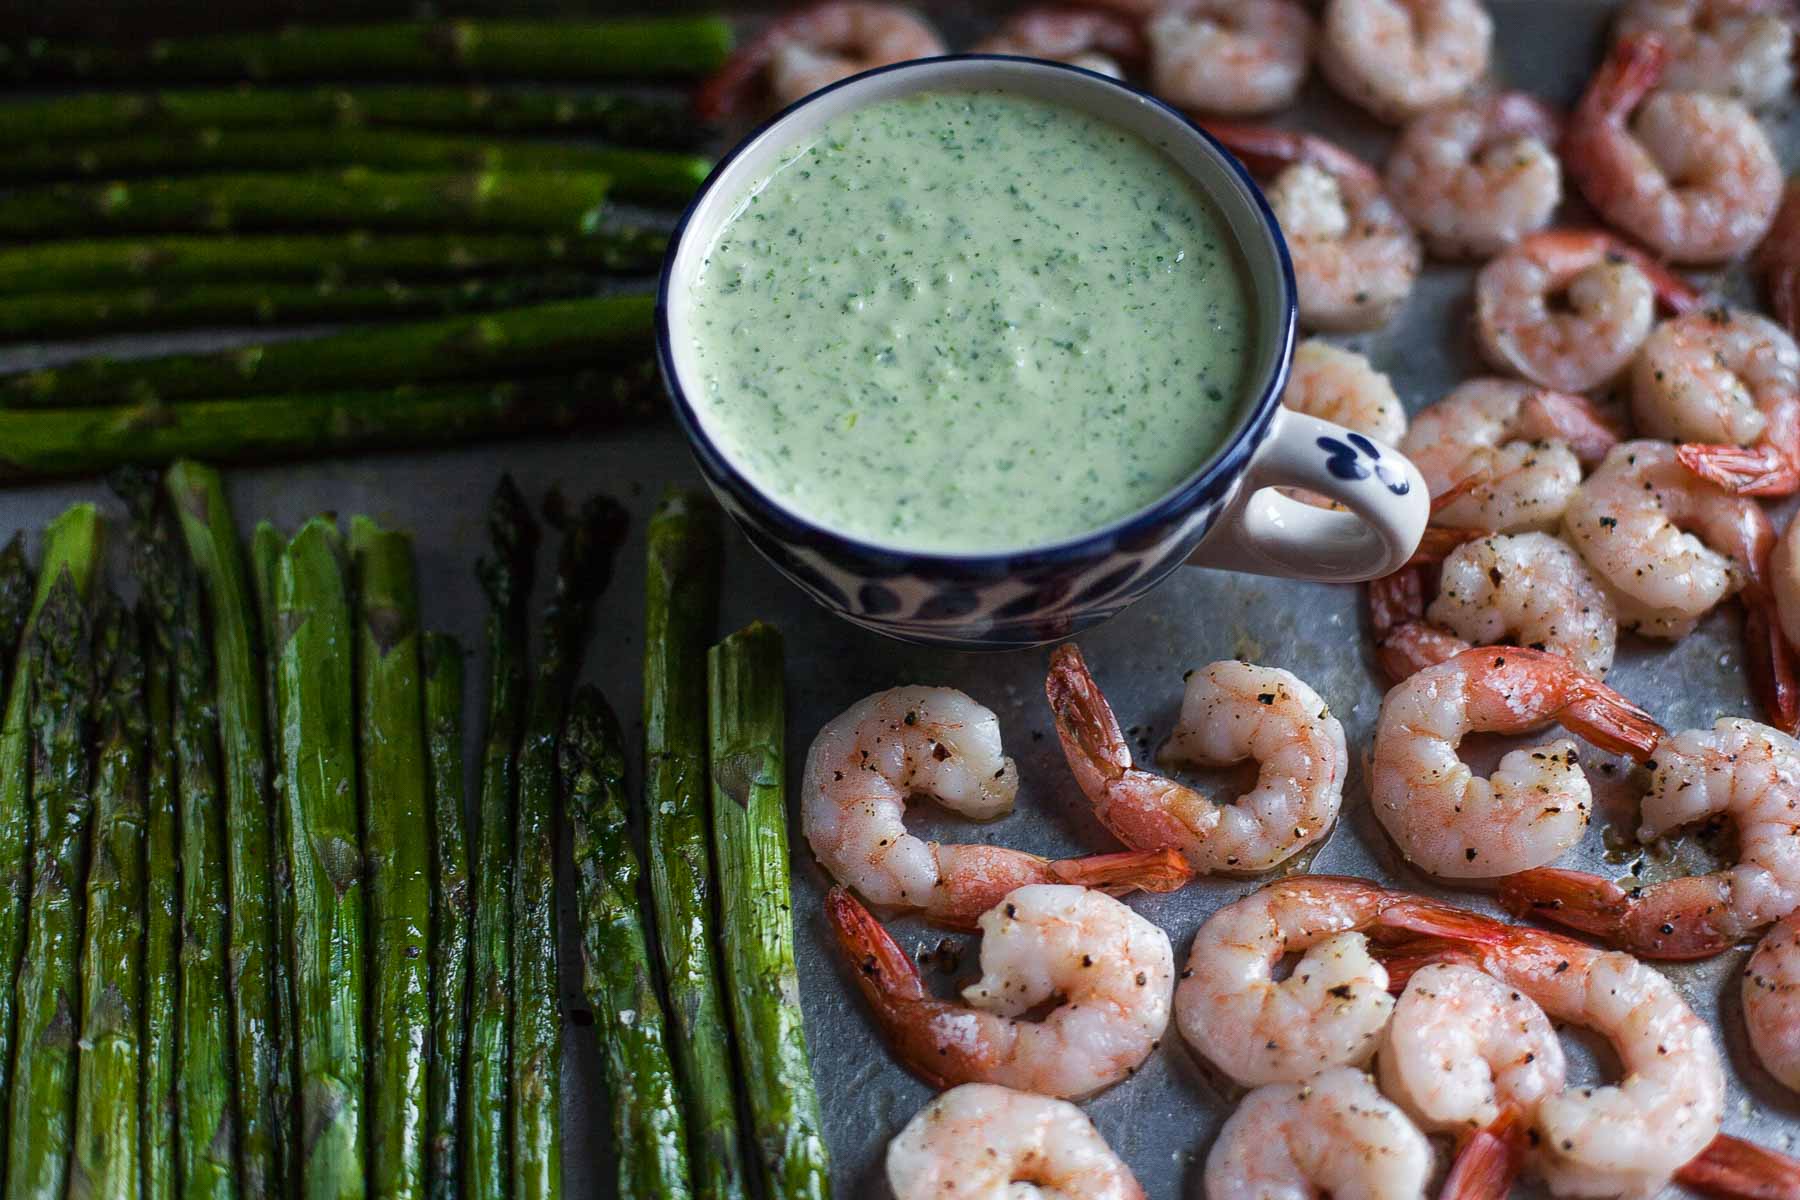
Roasted Shrimp and Asparagus with Green Goddess Dressing #30MinuteMondays

Roasted Shrimp & Asparagus with Green Goddess Dressing (Paleo) | acalculatedwhisk.com #30minuteMondays

Succulent roasted shrimp and asparagus are served with a tangy garlic scape green goddess dressing for an easy, 30-minute paleo dinner that's also Whole30-compliant.

I'm kind of mad at myself because I missed the boat on ramps this year. At the photography workshop I went to in May we ate them at almost every meal (there's a picture of them in this post), and when I got home I vowed to track some down so I could cook with them myself for the first time. However, I'm a lazy late-evening grocery shopper and there were never any ramps left. Before long, their short season had ended.

You'll be relieved to hear that I am NOT missing out on garlic scapes.

garlic scapes v3

While ramps are their own kind of plant and are usually foraged wild (hence their limited availability), garlic scapes are the flowering stalks of garlic plants that farmers cut off so the plant's energy can be fully devoted to the bulb forming below. Garlic scapes are cool looking (see evidence above) and I like their name: it sounds like they've been trying to escape from the head of garlic, which is pretty much what they actually do.

Garlic scapes are milder than regular garlic with some fresher, grassier notes to their flavor--kind of like a cross between garlic, scallions, and chives. Here I used them to make a green goddess dressing with some fresh herbs and Primal Kitchen's avocado oil mayo, which I just tried for the first time. I'm not a mayo person at all so I don't foresee myself ever eating it straight up, but once some other flavors are mixed in to create a dressing or aioli, I can usually hop on board. (If you haven't seen garlic scapes at your local market, don't worry. You can substitute scallions and a clove of regular old garlic.)

Yum

Monday, November 10, 2014

Kratiem Prik Thai Short Ribs with Quick-Pickled Carrots

Kratiem Prik Thai Short Ribs with Quick-Pickled Carrots--a delicious and flavorful paleo meal | acalculatedwhisk.com

Wintry weather has already made an appearance in Boston; we had our first snow, albeit a small one, last weekend.  I hate being cold outside and abhor feeling cold indoors even more, but I also, like a true New Englander, am always reluctant to turn on the heat.

My best solution for cold days at home is to have something in the oven pretty much at all times.  And since I can't always be making and eating desserts, my favorite thing to do is braise meat or chicken.  The cooking time is nice and long, so it will really warm up your house (or at least your kitchen).  The bonus effect of this heating strategy is that you will also be really well fed.

Yum

Tuesday, October 14, 2014

Butternut Squash Soup with Fried Garlic and Chili Oil


A little over a week ago, my laptop gave me the prohibitory sign when I tried to turn it on.  Now that's all it will do--show a gray screen with a circle with a slash through it, and one of those little timers that never stops turning.

I'm in the process of mourning the photos I lost and trying to scrape together money to buy a new computer.  Luckily, my school lent me a laptop to use in the interim--a giant, clunky monster of a PC, but so much better than nothing.  I've been comforting myself with this soup.

Yum

Thursday, March 27, 2014

Sweet Potato & Roasted Garlic Hummus


Is it spring yet?  It's still freezing here.  Also, yesterday was so windy that I ended up getting dust and tiny pebbles blown into my eyes several times during my ten-minute walk to the train.  A little early-spring sandstorm right here in Boston.  Needless to say, I was not a fan.

I'm trying to keep my food springy, in hopes that the weather will follow suit.  So, here is some paleo (chickpea-free) hummus.  It's a little sweet from the sweet potato, but with lots of savory flavor from the tahini, a whole head of roasted garlic, and some garlic-infused olive oil.  Don't be intimidated by the large quantity of garlic--it mellows out as it roasts, and the flavor is amazing.  Your house will smell amazing, too.

Yum

Wednesday, January 8, 2014

Sweet Potato & Kale Gratin (Whole30 Day 8)


Phew!  Posting every single day is starting to get very exhausting!  

Don't get me wrong--I love to dream up recipes, cook, take pictures, and then write about it.  It's just that somehow I find myself on the couch each evening around 11, realizing there is so much work left to do!  Yesterday's post (a roundup of 7 paleo blogs I love, in case you missed it) went up at 11:59 pm.  It always takes a little bit of pressure to actually get my nose to the grindstone.

I think that since it's 10:58 right now, and I already have the photos and the recipe all set, I should be getting this one up a little earlier.

But before I hit "publish", though, let me tell you about this good-looking gratin!

Yum

Saturday, January 4, 2014

Chicken Meatballs with Garlic Kale Marinara (Whole30 Day 4)


I've always been more of a baker than a cook, but I'm working hard to change that, especially since starting my Whole30.  It's exciting to try lots of different meats in lots of different forms.  Yesterday I made pork belly (you can see the before & after pics on Instagram--it was good, but not quite good enough to share with you!).  Today I used ground chicken to make meatballs.  I am so happy with the way this dish turned out--it's one of the best savory recipes I've made!  The meatballs are moist and rich, and the sauce provides the perfect level of tart tomato and roasted garlic flavor.

Yum

Tuesday, November 12, 2013

Mashed Rutabaga & Squash with Roasted Garlic (Vegan, Paleo, Gluten-free)


Have you ever tried rutabagas?  They're also called yellow turnips, and they make an amazing low-carb replacement for mashed potatoes.  I was initially inspired to try them after seeing Ina Garten's recipe for mashed rutabaga with crispy shallots, and I like to serve them with bacon-wrapped shrimp.  I once asked Ben what his favorite dish that I'd ever made was, and he told me he's always happy when I make mashed rutabaga.

Since I'm working on Thanksgiving sides this week, I wanted to put a fall spin on mashed rutabaga.  Here I've added winter squash, as well as a generous amount of roasted garlic.  The combination is fabulous.  Don't be scared by the fact that this recipe calls for a whole head of garlic--once the cloves are roasted, they're soft, mellow, and almost nutty.  If you haven't roasted garlic before, you have to try it.  It's really nothing like its pungent, raw self.  If you need more reasons to try it, consider this: garlic has lots of antioxidants, and you won't have to worry about running into any vampires.

Yum

Tuesday, September 3, 2013

Stuffed Zucchini with Goat Cheese & Herbs


Cheese is back!  After finishing up my version of a Whole 30, I've been adding some dairy back into my diet.  I've made some interesting discoveries.  I used to think that too much coffee upset my stomach, but since switching to almond milk, I realized it was all the milk in my coffee that was causing me problems (I like a LOT of milk in my coffee).  So I'm trying not to go too crazy with the dairy, but I'm fine with a little cheese.  

Goat cheese is one of my favorite cheeses, and it's one that people who are lactose intolerant can often still enjoy.  Apparently this is because the fat molecules in goat's milk are shorter than those in cow's milk, and thus easier to digest.  Whatever the reason, I'm glad I can enjoy goat cheese.  It really takes these stuffed zucchini over the top.

One more note on ingredients: this was my first time cooking with ground pork.  It was so good!  Why is everyone still buying ground beef all the time?  I mean, I'm sure this recipe would be good with beef, or even ground chicken or turkey, but the pork just has so much great flavor.  Perhaps this is due to a higher fat content?  What I really want to know is this: why don't people make hamburgers out of ground pork?  Any thoughts?  After all, they are called HAMburgers...

On to the recipe!  I'm eager to try this with other vegetables as well: maybe mushrooms instead of peppers, or shallots instead of onions.  Let me know if you try this or any variations!

Yum

Sunday, August 11, 2013

Spicy Cocoa Chili


If you are going to eat paleo, you are going to need a lot of protein in your fridge.  Otherwise, you will be constantly cranky.

Yum

Tuesday, August 6, 2013

Shrimp & Zoodles with Garlic Tomato Sauce


Have you ever made zoodles?  If you get yourself a julienne peeler, you can be making zucchini into low-carb noodle stand-ins in no time.  It's actually really good.  You may not be able to fool people into thinking they are eating actual spaghetti, but I don't think anyone will be complaining.


Yum

Thursday, June 27, 2013

Garlic Naan


Homemade naan is SO delicious, and it's not hard to make.  I think this naan is even better than what I get at my favorite Indian restaurant--it's an irresistible accompaniment to almost anything.  Kneading and rolling the dough is actually really fun; it only needs to rise for 45 minutes, so it's a totally viable weeknight dinner option.  Plus, you won't even have to turn on your oven!

Garlic naan is my favorite, but if you prefer plain naan, you can just omit the garlic and cilantro.  It will still be amazing.  I was all excited to use cilantro, but found that my bunch had totally frozen in the fridge and looked really sad.  I guess my fridge is too cold!


Ingredients (adapted from Budget Bytes; makes 8 pieces):

2 teaspoons active dry yeast
1 teaspoon sugar
1/2 cup warm water
1/4 cup olive oil (or vegetable oil)
1/3 cup plain greek yogurt (I used 2%)
1 teaspoon garlic paste (optional)
1 egg
1/2 teaspoon salt
2 1/2-3 cups flour, divided, plus extra
10 or so cloves of garlic, minced
1/3 cup fresh cilantro, chopped (optional)
Butter or ghee for cooking and serving

In a small bowl, mix the yeast, sugar, and warm water until the yeast dissolves.  Let the mixture sit for a few minutes until it foams up.  Stir in the oil, yogurt, garlic paste, and egg.

In a medium bowl, mix the salt with one cup of the flour.  Add the wet ingredients and stir until well mixed.  Add more flour 1/2 cup at a time, stirring well after each addition, until you can no longer stir the dough with a spoon.

Turn the dough out onto a well-floured surface.  Start kneading the dough, adding flour as needed to keep it from sticking.  Knead for about three minutes, until the dough is soft and smooth but not sticky.

Let the dough rest, lightly covered with a kitchen towel, for about 45 minutes or until doubled in size.

Flatten the dough a little, and cut it into eight wedges.  Pick up each wedge and stretch the dough from the top around to the bottom a few times to create a ball.

Heat a little butter or ghee in a cast iron skillet over medium heat.

Dip each side of the dough ball in the minced garlic and cilantro, then roll it out until it's about six inches in diameter.

Place the naan in the hot skillet, and cook on the first side until large bubbles appear on the surface and the bottom is golden brown.  Flip the naan and cook until golden on the other side.

Serve topped with a little more butter or ghee and accompanied by your favorite curry.


Yum

Monday, June 17, 2013

Homemade Pasta, Midnight Style


Did you know that if you have flour, eggs, salt, olive oil, and garlic (and a sense of adventure and a little time on your hands) you can make your own gourmet pasta dinner?

It's true, and while it's not quick or exceptionally easy, it is really fun and amazingly delicious.  Plus, I feel like making your own pasta earns you some bragging rights.  My boyfriend is tired of hearing me brag, so I'm here to share my homemade pasta conquest with you.

Ready to try it?  You know you want to!  Here are my step-by-step photos and notes on the process.  Scroll down for a recipe for midnight fettucine--a simple sauce to let your pasta shine.

This is a special recipe from America's Test Kitchen for people who DON'T have special pasta machines.  So if you're fancy and do have a machine, this might not be the right recipe for you.  But, leave me a comment about what machine you have and how you like it!

Here's the dough recipe (from America's Test Kitchen).

Ingredients:

2 cups flour, plus extra
2 large eggs
6 large egg yolks (save the whites for this or this or a healthy breakfast scramble)
1 tablespoon salt
2 tablespoons olive oil

Put 2 cups of flour and all the remaining ingredients in your food processor.  Whir until the mixture comes together into a ball.

Touch the dough.  If it sticks to your fingers, add more flour a tablespoon at a time until it's just a little bit tacky.

I found this hard to do in the food processor, so I dumped the dough out onto a cutting board and worked in extra flour until it felt right.  I added 3-4 tablespoons.


Dump the dough out onto a lightly floured surface and knead it with the palms of your hands for a couple of minutes, until it feels really smooth.


Form a cylinder of dough that's about six inches long.  Flour it lightly on all sides (otherwise it will stick) and wrap it in plastic wrap.

Let the dough rest at room temperature for at least one hour and up to four.  The longer you let it rest, the easier it will be to roll out.  I let mine sit for an hour and a half and rolling it out took a little elbow grease, but went just fine.


When you are ready to roll out your dough, unwrap it.  Using a sharp knife (I subsequently discovered that my pizza cutter is NOT super sharp), cut the dough into six equal pieces.

You will work with one piece at a time, so wrap the remaining pieces back up with plastic wrap (flour them a little first and wrap them individually).


Using your hands, form a 3 x 3 inch square with the dough and flour it lightly on both sides.
Use a rolling pin to roll the dough out into a six inch square.  As you can see, mine wasn't really square.  I did my best.  Lightly flour it again on both sides.


Place the rolling pin in the middle of the dough, and using one motion, pull the rolling pin toward you as you roll out the bottom half of the dough.

Then, place the rolling pin in the middle again.  This time, push the rolling pin away from you to roll out the top half of the dough.

Repeat this process until the dough is about 20 inches long and 6 inches wide, and you can see the outline of your fingers through it.

Set rolled out strips aside on a kitchen towel to dry a little while you roll out the rest of the dough.

When you finish rolling out the strips, go back and get the first one.  The edges should feel a little firm and dry.  If it isn't floury, flour it lightly on both sides so it won't stick to itself.

Starting with one of the short ends of the dough, roll up the strip by folding over two inch segments.  Don't push the layers together, just roll them up very gently.


Using a very sharp knife, slice the roll crosswise into 1/2 inch wide slices.

Unroll them with your fingers.  Ta-da!  Fresh fettucine.  


Set the finished pasta strips aside on a baking sheet while you finish rolling and slicing the rest of the dough.

Cook the pasta within an hour, or freeze it.  To freeze, place the whole baking sheet in the freezer until the pasta is firm.  Transfer to an airtight zip top bag and store for up to two weeks.  You can boil the pasta straight from the freezer.

To cook the pasta, boil in a large pot of salted water until just al dente, 1-3 minutes (it might take longer with frozen pasta).  Fresh pasta cooks really fast, so check it early!

I used my fresh pasta to make midnight fettucine.  This easy pasta is called midnight fettucine (or spaghetti) because chefs like to make it as quick and easy meal when they get home from work at midnight.  I loved it with this fresh pasta, but you can make it with any pasta and it will still be delicious.  You can dress it up with parmesan, parsley, or red pepper flakes if you want, but I like it best just the way it is.

Ingredients:

1 pound pasta
1/3 cup olive oil
10-15 cloves of garlic, peeled and minced
Salt to taste

Heat the olive oil in a large skillet over medium low heat.  Add the garlic and cook, stirring frequently, for about ten minutes.  You want the garlic to soften and sizzle but not brown, so reduce the heat if it starts to turn golden.

Cook the pasta until al dente and drain, reserving one cup of the cooking water.

Toss the pasta with the garlic and oil, season to taste with salt, and add cooking water as necessary to thin out the sauce.  Serve hot.


Yum

Tuesday, June 4, 2013

Garlic Honey Grilled Shrimp


Yesterday I really wanted to fire up the grill and make some shrimp.  That is, I wanted my boyfriend to fire up the grill and make me some shrimp.  To be totally honest, I don't know how to grill.  Coals and lighter fluid and all that--it's a mystery to me.  Give me a hot grill, though, and I'll totally stand there and flip.  I've got that part under control.

Anyway, Ben wasn't excited about grilling.  I, however, was super excited about the yummy garlic honey marinade I'd dreamed up, and decided I could just broil them.  I've made skewers of shrimp in the broiler before and they always come out great.  But, at the last minute, Ben changed his mind and fired up the grill.  I guess he didn't like the thought of what a 500 degree oven would do the temperature in our apartment on this 90-degree day.  So, I got to grill in the end and we had a great time lounging on the patio, flipping shrimp skewers.

We ate these on top of this salad and it was a very satisfying combination.

    
Ingredients (serves 2-3):

1 pound shrimp, peeled and deveined, tails on
4 tablespoons olive oil
1 teaspoon garlic paste
2 1/2 tablespoons honey
Salt and freshly ground black pepper
1/4 teaspoon cumin
Pinch of cayenne


Soaked wooden skewers (soak in hot water for 30 minutes or more to keep them from catching fire)

Mix the olive oil, garlic, honey, and spices, and pour over the shrimp.  Toss to coat.  Marinate for up to 30 minutes at room temperature or 2 hours in the refrigerator.

Prepare the grill, or preheat your broiler.

Skewer the shrimp--I like to thread the skewers through each shrimp twice so they are easy to flip on the grill.  I used six skewers for this recipe, with 5-6 shrimp on each skewer.

Grill or broil for about 3 minutes per side, or longer as necessary, until charred in spots and opaque throughout.  Serve hot.
Yum

Tuesday, May 28, 2013

Gambas al Ajillo--Sizzling Garlic Shrimp


For my birthday, we went to dinner at Solea, a fabulous tapas restaurant in Waltham.  If you live in the Boston area and haven't been, you need to try it!  It's one of my absolute favorite restaurants.

Ben, my mom, and I ordered six tapas to share.  We got sizzling garlic shrimp, scallops in saffron cream, lamb meatballs in truffle cream sauce, greens sauteed with pine nuts and raisins, and baked goat cheese.  Everything was amazing.  I ordered a blood orange sidecar to drink, which was delicious, and we started out snacking on a really good chickpea-porcini mushroom spread (my take on that coming soon).  The whole meal was great and I highly recommend everything we ordered.


I decided the sizzling garlic shrimp would be fun to recreate at home.  At Solea they serve them still bubbling in a small cazuela.  You could achieve the same effect by putting the shrimp into ramekins and sticking them under the broiler for a couple of minutes before serving.  If you try that, don't cook the shrimp all the way on the stovetop since they'll finish cooking under the broiler.

Ingredients (inspired by Solea, serves 4-6):

1/2 cup olive oil
10 cloves garlic, peeled and thinly sliced
1 pound raw shrimp, peeled, deveined, and tails removed, defrosted if frozen
Salt and pepper to taste
1/4 teaspoon paprika
Pinch or two of red pepper flakes, optional

Preheat the broiler, if using.  Heat the olive oil in a heavy skillet over medium-low heat.  Add the garlic and saute, stirring frequently, for about five minutes, until the garlic is softened but not browned.

Add the shrimp, raise the heat to medium high, and sprinkle with salt, pepper, paprika, and red pepper.  Cook for three minutes on each side or until the shrimp are completely opaque.  Serve hot.  If you decide to broil the shrimp in individual ramekins, cook on one side in the skillet, flip over into the ramekins, top with some of the oil and garlic, and broil until opaque throughout, about 3 minutes.

Yum

Sunday, May 26, 2013

Linguine Rustico with Whole Cloves of Garlic


I love pasta!  Here is a delicious, vegan pasta dish that is not for the faint of heart.  It's filling, packed with flavor and the perfect amount of spice, and easy to make.  The chickpeas make it hearty and satisfying, and the garlic cloves are mellow and almost sweet after simmering to golden perfection in the olive oil.

Ingredients (serves 2):

1/4 cup olive oil
25 cloves of garlic, peeled
8 ounces linguine
1 15 ounce can chickpeas, rinsed and drained
1/2 cup tomato sauce (I used Goya Spanish style tomato sauce)
1/3 cup white wine (I used chardonnay)
Salt and freshly ground black pepper to taste
Pinch or two of crushed red pepper flakes, to taste
2 tablespoons chopped fresh parsley, plus more for serving

Heat the olive oil in a large skillet over medium heat.  Add the garlic and cook, stirring occasionally, until the garlic is soft and well-browned on all sides, 20-25 minutes.  This part can't be rushed.  I promise that after this step, the rest of the dish comes together quickly.

Meanwhile, cook the pasta until al dente and drain, reserving about a cup of the cooking water.

When the garlic is browned, raise the heat to medium high and add the chickpeas with a sprinkle of salt and pepper.  Cook for 2-3 minutes, then stir in the tomato sauce.  After 2-3 more minutes, add the wine.  Let it bubble away for a minute or so.

Toss the pasta with the sauce, adding pasta water as needed.  Add salt, pepper, and red pepper flakes to taste.  Stir in the parsley and serve hot, topped with a little more parsley.


Yum

Friday, April 12, 2013

Pasta with Goat Cheese and Caramelized Garlic and Onions

image


So, last week I made a caramelized onion risotto that I read about on A Bitchin’ Kitchen.  It was delicious, but not very photogenic.  All I had was red onions, and those are just a fifty bad shades of gray when caramelized.  But, it got me thinking about how I should do more with caramelized onions.  And I decided to throw some garlic in there, too, because I believe everything is better with garlic.  Plus garlic gets nutty and sweet when it’s cooked long enough, and I love that.  The dish had to be pasta, because I don’t like rice that much.  And what else could I think of to make the dish fabulous?  Goat cheese, of course!  Only the best cheese ever.  I threw in some green peas for another sweet flavor, and to add some color to the dish.  I hope you like it!
Ingredients (serves 2-4):
3 tablespoons olive oil
2 yellow onions, halved through the core and thinly sliced
6 cloves garlic, sliced into slivers
1 cup frozen green peas
1 pound penne or other pasta
2 ounces goat cheese, plus extra for serving
1/2 cup freshly grated parmesan cheese
3 tablespoons milk or cream
Salt and pepper to taste
image
Heat the olive oil in a large skillet over medium-high heat.  When it is hot, add the garlic and onion and sprinkle some salt on top.  Leave them alone for a few minutes to get the browning process started.  Then, cook, adjusting the heat as necessary to prevent burning, stirring occasionally, until the onions and garlic are a rich golden brown, about 25 minutes.  Add the peas and cook for another five or so minutes, until the peas are bright green and tender.
image


Meanwhile, cook the pasta al dente and reserve one cup of the cooking water.  Combine the pasta, vegetables, goat cheese, parmesan, and cream or milk.  Toss to combine, and season to taste with salt and pepper.  If the pasta seems too dry, add some of the pasta cooking water until it looks just like you like it. Top with additional crumbled goat cheese and serve hot.
image


Yum