Showing posts with label cookies. Show all posts

Tuesday, February 3, 2015

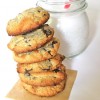
Salted Chocolate Chip Hazelnut Cookies


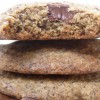
I've had four snow days in the past two weeks. Luckily, I've spent my extra time off pursuing an admirable goal: baking the ultimate grain-free chocolate chip cookie.

My quest began when I saw these soft and chewy chocolate chip cookies on Alexandra's Kitchen. Alexandra's blog is one of my favorites. Everything she makes is mouthwatering, and I love her detailed tips and stunning, perfectly lit photographs. Basically, I'm a huge fan.

I had to have those cookies.


With a caveat, of course: I wanted them to be paleo-friendly and grain-free.

I've made paleo cookies before and thoroughly enjoyed them, but they weren't the kind of cookies that could blow regular, gluten-containing cookies out of the water.  They didn't have the holy grail: the perfect combination of crunch and chewiness.

I set out to find some grain-free cookies that fit the bill--cookies that were crisp around the edges, but chewy and a tiny bit underbaked in the center.

Yum

Wednesday, December 24, 2014

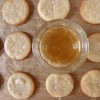
Chewy Molasses Cookies


Is it too late for a Christmas cookie?

If it is, I understand.  I hope you'll consider this as you're choosing a Boxing Day, New Year's Eve, or random January afternoon cookie.  Chewy grain-free molasses cookies work anytime.

Normally I don't love cookies unless there's chocolate or caramel involved, but I've made an exception here.  There's something about the rich flavor of molasses in a chewy cookie with a hint of crunch from a coating of sparkling sugar that I can really get into.

Yum

Monday, October 27, 2014

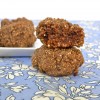
Almond Butter Thumbprints with Salted Caramel

Almond Butter Thumbprints with Salted Caramel (Gluten free, Grain free) | acalculatedwhisk.com

My mom, my boyfriend, and I are really grateful to Karen of Karen's Kitchen Stories for introducing us to these amazing cookies.  I know it's a bit hard to believe because this was a pretty big batch, but we ate them all between the three of us.  I was not interested in sharing with anyone else because they were too good.

Almond Butter Thumbprints with Salted Caramel (Gluten free, Grain free) | acalculatedwhisk.com

Almond Butter Thumbprints with Salted Caramel (Gluten free, Grain free) | acalculatedwhisk.com

Even though they're paleo cookies made with almond butter, they taste very similar to traditional peanut butter cookies, and the crumbly, buttery cookie and creamy salted caramel are an unbeatable team.

Yum

Wednesday, March 12, 2014

Salted Nutella Cookies + Cuina Baking Mat Giveaway


Disclosure: I received this product as part of an advertorial.

Ever since a friend of mine brought over some amazing nutella brownies a couple weeks ago, I've been dying to make a dessert of my own with the addictive chocolate hazelnut spread.  With a little research, I discovered that you don't have to add many things to nutella to make a delicious brownie batter or cookie dough.  You can even make gluten-free nutella brownies with just three ingredients.  However, I decided to make cookies--I was craving something that was both chewy and crunchy, and wanted another chance to use my Cuina silicone baking mat.

I was almost all set to make these cookies--I just needed a jar of nutella.  So, in case you were wondering, here is how to spend most of your day on a desperate search for chocolate hazelnut spread:

1. Wake up and tell your boyfriend he can take the car to work, since it's your spring break and all you really have to do all day is make cookies.

2. After he leaves, immediately regret your decision when you remember you need to go out and buy nutella for the cookies.

3. Eat some leftover bacon & sweet potato chili with a fried egg on top for breakfast, while wondering if there's any way to get nutella delivered to your home.  You decide there probably isn't.

Yum

Sunday, December 29, 2013

Sparkling Sandwich Cookies (Vegan, Gluten-free, Paleo)


I subscribed to Gourmet Magazine when it was still being published, and looked forward to getting it every month.  The cover photographs were always stunning, but the December 2008 cover really stuck with me.  The theme was cookies, and eight different gorgeous recipes were featured on the cover in different parts of the country.  I got the one with these glittering lemon sandwich cookies on it, and now, five years later, I finally got around to making my own version.


These sparkling cookies are vegan, paleo, gluten-free, and perfect for New Year's Eve.  They're also the most adorable cookies I've ever laid eyes on.  The cookies are richly flavored thanks to the almond flour and lemon zest, and the sugar coating provides the perfect amount of crunch.  I was planning to make the lemon filling from Gourmet's recipe, but I got lazy, and instead pulled out jars of raspberry jam and dulce de leche.  The tiniest amount sticks the cookies together, and provides the extra bit of sweetness that makes these sandwiches irresistible.  Also, they kind of look like miniature hamburgers!  How can you say no to that?

Yum

Saturday, November 30, 2013

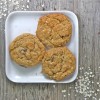
Lemon Sugar Cookies (Vegan, Nut-free)


I was invited to a Hanukah party last night, and needed to bring a dessert that was nut-free and vegan.  I wanted to bring a traditional Hanukah dessert, but soon realized I didn't know of any.  I guess I never really made it past the mountains of latkes at my family's Hanukah celebrations.  A quick search revealed that oily, fried foods like jelly-filled doughnuts are often eaten at Hanukah, but I wasn't about to fry up a big pile of donuts to be eaten hours later.  I also don't really like jelly-filled desserts; I feel that jelly belongs at breakfast.  Since I had dreidel and Star of David cookie cutters, I decided Hanukah sugar cookies would have to be traditional enough.  I also got out my snowman and snowflake cookie cutters, since winter is almost here.

My next task was to find a great vegan cookie recipe.  Since the cookies had to be nut-free, I soon realized it would be very hard to make them gluten-free as well.  So, these cookies are a total gluten bomb.  I promise to be back with more gluten-free eats very soon!

Yum

Monday, September 2, 2013

Caramel-Stuffed Snickerdoodles (Paleo, Gluten free)


Some people go crazy for snickerdoodles, but I'm not usually one of them.  Snickerdoodles have a lot of cinnamon, which is nice, but they don't have chocolate, caramel, or fruit.  Usually I require one of those three things in order to truly fall in love with a dessert.  Several weeks ago it occurred to me that snickerdoodles could be stuffed with caramel, and ever since I've been eager to try it.  I'm not the first one to try stuffing caramel inside a snickerdoodle, but I think I'm the first to try a paleo and gluten free version.

I made this honey caramel yesterday to drizzle on top of an apple honey cake that I'm working on for Rosh Hashanah.  The cake was delicious, but it still needs a little work.  I had half of the honey caramel left (it wouldn't all fit on top of the apple cake!) so I decided I needed to make the snickerdoodles.

These are easy to make (no creaming!) and fun to eat.  Before the photo shoot, I tried two cookies, one straight from the oven and one after they'd cooled.  (As a food blogger, I have to do these things.  You know, for science.)  Then, after I took my pictures, I had to eat all the cookies that had suffered casualties (been broken open) during the shoot.  I had to drink all the milk, too, because it would have been really hard to pour it back in the carton without a funnel.  The things I do for this blog!  Anyway, it was a fabulous snack and I think you should make some today.


Yum

Friday, July 26, 2013

Apricot Vanilla Cookies (Paleo, Gluten-free, No Sugar Added)


Yesterday I really wanted something sweet.  I've had good success so far making paleo treats sweetened with honey, but you're not allowed to have honey during the Whole30.  I thought there was nothing I could do to satisfy my sweet tooth, but then I remembered reading some of the fine print down at the bottom of the Whole30 site, where it said that fruit juice could be used as a sweetener.  At the time, I hadn't been able to imagine how fruit juice could make an adequate sweetener.  But, in my time of desperate sweets craving, I started to think maybe I could do something with this.

These cookies are sweetened with apple juice and dried apricots.  They don't taste like apple, but they do have a nice apricot flavor and a fun subtle orange hue.  They are, not surprisingly, not very sweet.  I won't judge you if you want to add a couple of tablespoons of honey.  If you do, you might want to add a little more almond flour as well (or less apple juice) so the batter won't be too wet.

If you like a moist, rich cookie that's guilt-free, these are for you.  The vanilla bean seeds, butter, and almond flour provide lots of great flavor and texture to make up for the cookies not being overly sweet.  And, with only five ingredients plus salt, these cookies couldn't be easier to make!  However, I'm not going to lie to you: they are not crispy at all.  I haven't figured out how to make gluten-free cookies crispy.  If you have the secret, please share it!  If you're looking for a sweeter cookie, check out the "You might also like" section at the end of this post.


Ingredients (makes about 15 cookies):

1/2 cup dried apricots, soaked in warm water for 10-20 minutes
1/2 cup apple juice
1 cup almond flour
6 tablespoons cold butter, cut into chunks
1/2 vanilla bean
1/4 teaspoon salt

Preheat the oven to 325, and line a baking sheet with parchment paper.  Drain the dried apricots and place them in a food processor with the apple juice.  Process, scraping down the bowl as necessary, until the mixture has a jam-like texture with very small pieces of apricot.

Add the almond flour, butter, and salt, and scrape in the vanilla bean seeds.  Process until well combined.  Spoon tablespoon sized balls of batter onto the prepared sheet and flatten them slightly (cookies will not spread as they bake).  Bake for about 12 minutes, until golden brown around the edges.  Cool for a few minutes on the sheet, then carefully transfer to a rack to cool completely.


You might also like:

Chewy Chocolate Almond Cookies (gluten-free, dairy-free)


Chocolate Chip Cookies (paleo, gluten-free)


Yum

Friday, July 19, 2013

Chocolate Chip Cookies (Paleo, Gluten-free)


This is it!  My new favorite chocolate chip cookie recipe.  Even if I weren't doing a month of paleo, I would still make these.  They are SO good--a little chewy, super chocolaty, not too sweet, with a good dose of vanilla.  In other words, perfect.

Several months ago, my friend Audrey emailed me a recipe for chocolate chip cookies with almond flour, which she said she liked better than the real thing.  I was a little skeptical, but finally tried it.  The cookies were delicious, but the recipe had no egg, and I found that the cookies fell apart easily and were a little too flat.  I tried again with a couple of eggs, which resulted in much sturdier cookies that were also delicious, but very cakey.

Hoping to strike a balance between too cakey and too flat and fall-aparty, I tried a third time.  As often happens, the third time was the charm!  I hope you make these cookies.  You won't miss the flour or the sugar (and they don't taste like honey).  They are really easy to make, and not that bad for you!  Do it!

Note: the main reason I chilled the dough here is because I wanted to leave the kitchen before I started preheating the oven (it's 100 degrees today!).  So, you can stay mostly cool and still make these cookies.  Try them!  You know you want to.


Ingredients (makes about three dozen small cookies):

8 tablespoons grass-fed butter
1/2 cup honey
1 and 1/2 teaspoons vanilla
Scant 1/2 teaspoon salt
1 egg
1/4 teaspoon baking soda
3 cups almond flour
7 ounces bittersweet chocolate, chopped (paleo chocolate exists, but I couldn't find any...so technically my cookies are just ALMOST paleo)

In a large bowl, cream the butter with a fork until smooth.  Add the honey, vanilla, and salt and stir until very smooth, then add the egg and stir to incorporate.  Add the baking soda, almond flour, and chocolate chunks and stir until combined.  Refrigerate the dough for up to 30 minutes if possible.

Preheat the oven to 350 and line 3 baking sheets with parchment paper (or if you don't have three, like me, bake in batches--just be sure to let the cookie sheet cool between batches).  Scoop tablespoon-sized balls of dough onto the sheet, flattening them a little if you like a flatter cookie.  They don't spread much while they bake, and will be adorably domed if you leave them alone, but I flattened some because I am planning to make ice cream sandwiches.

Bake for 8-10 minutes, until golden brown on top but not burned on the bottom.  The cookies will be unstable, and need to cool on the pans for at least five minutes.  After that, carefully transfer them to a rack to cool completely.

You might also like:


Chocolate Chip Quinoa Cookies


Mocha Chip Cookies


Chewy Chocolate Almond Cookies

Yum

Monday, July 1, 2013

Double Malt Ice Cream Sandwiches #chocolateparty


Did you ever get a malt cup from an ice cream truck as a kid?  Malt cups were always my favorite.  It's not a bar or anything fancy--just a cup of chocolate malt ice cream that you eat with one of those little spoons.  I've been wanting one forever, so I finally ordered some Milo online and made my own version.  If you like malt, you will LOVE this.

I was just thinking about ice cream, but then I found out that this month's chocolate party secret ingredient was ice cream, and that the recipes had to call for both ice cream AND chocolate (so, not just ice cream with chocolate in it!).  Well, what else was there to do?  I baked up some lightly malted chocolate chip cookies and stuffed the ice cream inside.  These ice cream sandwiches would also be delicious with any other ice cream flavor--feel free to use store bought or your favorite homemade flavor.

P.S.  While you're here, check out this giveaway!  You could win a copy of an awesome food photography e-book.


Ingredients:

For the cookies (from Hummingbird on High's recipe, makes about 24):

1 cup flour
Rounded 1/4 cup Milo
1/2 teaspoon salt
1/2 teaspoon baking powder
1 stick butter (8 tablespoons), at room temperature
1/2 cup brown sugar
1/4 cup white sugar
1 egg, at room temperature
1/2 teaspoon vanilla
1 cup chocolate chips (I used semi-sweet baking melts)

For the ice cream sandwiches (makes 12):

24 cookies
1 quart chocolate malt ice cream (recipe below) or any other ice cream, softened

To make the cookies, preheat the oven to 375 and line two baking sheets with parchment paper.

In a small bowl, whisk together the flour, baking powder, salt, and Milo and set aside.

In a large bowl, cream the butter and two sugars with an electric mixer until light and fluffy.  Add the egg and vanilla, and beat just until combined.

Add the flour mixture to the other ingredients, and mix by hand JUST until combined.  Fold in chocolate chips.

Using a tablespoon measure, spoon out tablespoon-sized balls of dough at least 2 inches apart on the parchment paper.  Bake for about 8 minutes, until cookies are just set and barely beginning to brown around the edges.  Let them cool for a few minutes on the sheet to firm up, then transfer to a wire rack to cool completely.  Once they are cool, stick them in the freezer for an hour or so.  This will make it easier to assemble the ice cream sandwiches.

To make the sandwiches, match the cookies up by size.  Place a scoop of softened ice cream on one frozen cookie (bottom side up), and top with the other cookie, top side up.  Smoosh a little to help the ice cream get to the edges.  Wrap each ice cream sandwich individually and store in the freezer for up to two weeks.  Before serving, let the sandwiches thaw for about five minutes.

Ingredients for the chocolate malt ice cream:

1/2 cup Milo
1/2 cup sugar
3 cups heavy cream, divided
1 1/2 cups 2% milk
1 cup Whoppers, crushed (optional)

In a medium saucepan, combine the Milo, sugar, and half the cream.  Heat over medium heat, stirring constantly, until the sugar and Milo are dissolved and no clumps are left.  Remove from the heat and stir in the remaining cream and the milk.

Chill the mixture completely by refrigerating overnight or placing in the freezer for about an hour.  Once the mixture is totally chilled, freeze it in your ice cream maker.  When the ice cream is almost done, add the Whoppers, if using.  Store in the freezer in an airtight container.


Want to participate in this month's chocolate party by sharing a treat with chocolate and ice cream?  Here's how to participate:

1.) Blog about your chocolate treat. Your recipe must include the two ingredients we choose (chocolate and ice cream for July). It can be a simple no bake treat or a sophisticated layer cake, the complexity level of the recipe is totally up to you.
2.) Include a link back to a monthly round-up or the Chocolate party page. Optional, add the Chocolate Party logo in your blog post or on your sidebar.
3.) Your recipe must be published during the current month. Please do not link old recipes, they will be deleted.
4.)  Add your link below! 


Yum

Sunday, June 16, 2013

Chewy Chocolate Almond Cookies


Guess what?  In only 20 minutes, you can have rich, chewy chocolate almond cookies with no gluten, no butter or oil, no egg yolks, and no dairy!  It sounds too good to be true, but these cookies are really delicious!

You'll end up with a couple of egg yolks, which you could save for ice cream.


The bad news is that my bag of almond flour is now almost gone!  I'll definitely be buying more.  From financiers to mocha brownies to these cookies, it's my new favorite healthy baking ingredient.  Go get some and make these today!

Note:  You won't taste the coffee in these cookies--I just added it to bring out the chocolate flavor.  You can leave it out if you want a decaf cookie :0.

Ingredients (adapted from Heather's Dish):

2 cups almond flour
1/2 cup sugar
2 rounded tablespoons cocoa
1 teaspoon finely ground coffee (optional)
1/4 teaspoon salt
2 egg whites
1/2 teaspoon vanilla
1/4 teaspoon almond extract (optional)

Preheat the oven to 350, and line a cookie sheet with parchment paper.  In a medium bowl, mix together the dry ingredients.  Add the egg whites, vanilla, and almond extract and stir until the dough comes together.

Drop tablespoon-sized balls of dough onto the parchment paper, and flatten the tops slightly with your hand or a spoon (the cookies will not spread much at all while cooking).  Bake for 10-15 minutes, until crisp on the outside but not burned on the bottoms.  Cool on a wire rack.


Yum

Monday, June 10, 2013

Vanilla Bean Financiers


Ever since I found out about financiers, I've been wanting to make them.  They are French cakelets made with brown butter and almond flour, and traditionally baked in a financier mold (I really want one, but haven't gotten myself one yet).  Some people say a bakery near Paris' financial district started making these cookies and calling them financiers because they're shaped like bars of gold.  Others say they are called that because they're so rich that only financiers can afford to eat them.


Either way, I knew I was going to love the combination of brown butter and almond flour, and I did!  I added vanilla bean because I love the taste of vanilla and almond together, but to be more traditional you could leave the vanilla out.  If you make this version, you'll notice beautiful little flecks in two shades of brown: dark brown from the vanilla bean seeds and golden brown from the brown butter.  So pretty!

Once I get my financier pans, I want to try making some fruit-studded financiers--maybe a few raspberries or thin slices of peach on top.


These financiers are best warm and fresh from the oven, but are also delicious the next day, especially dunked in some milk or coffee.

Ingredients (makes 18 mini-muffin sized financiers; adapted from Dorie Greenspan's recipe):

1 1/2 sticks (12 tablespoons) unsalted butter
1 cup sugar
1 cup almond flour
6 egg whites
1/2 vanilla bean
1 cup flour*

In a medium saucepan, melt the butter over medium heat.  Continue to cook, swirling the pan occasionally, until the butter comes to a boil and browns.  As soon as the butter browns, remove the pan from the heat.  (If you haven't browned butter before, check out this step-by-step tutorial from How Sweet It Is.)

In another saucepan, stir together the sugar and almond flour.  Scrape in the seeds from the vanilla bean.  Using your fingers, rub the mixture to evenly distribute the vanilla.  Stir in the egg whites.  Heat the mixture over low heat, stirring constantly with a wooden spoon, until the mixture is runny, lightened, and hot.

Remove from the heat and stir in the flour.  Gradually mix in the butter.

Refrigerate the batter for at least one hour, or up to three days, with plastic wrap right on top of the surface to keep out air.

Preheat your oven to 400.  Butter mini muffin tins or financier molds, then dust with flour and tap out any extra.  Fill molds almost to the top with batter and bake for 10-13 minutes, until puffed, golden brown around the edges, and set.

Turn out financiers onto a wire rack and cool to room temperature (or enjoy them warm).

*The recipe only called for 2/3 of a cup and I meant to follow it exactly except for the addition of the vanilla bean, but read the quantity wrong when I glanced at the recipe before adding the flour.  The cookies still turned out great.  You could try them with 2/3 or a full cup of flour; I just wanted to report exactly what I did.  Next time I'll check twice!


Yum

Friday, June 7, 2013

Chocolate Chip Quinoa Cookies


Have you ever seen quinoa flakes?  I got a package of them, fascinated not by the fact that you can eat quinoa for breakfast as a hot cereal, but by the fact that you can use it instead of oatmeal to make cookies.  There's a recipe right on the back of the bag!

I was looking for an excuse to make more cookies, and for a way to make them seem sort of healthy.  Chocolate chip quinoa cookies--done and done.

I'm bringing these to this week's link party at Shaken Together Life.  Check out all the other great things people are making!


Do you like to try back-of-the-bag recipes?  I usually find they're pretty good.  This particular one didn't call for chocolate, but I knew I needed chocolate chunks in my cookies.  I substituted almond butter for the peanut butter the recipe called for because I had some and I like it so much.

The cookies turned out great.  The almond butter gives them the great texture that peanut butter cookies always have, the quinoa adds a little crunch but is less obtrusive than oatmeal, and the honey and brown sugar combine to make a flavorful but not-too-sweet cookie.  To make these vegan, you could use margarine (the original recipe calls for it) and agave (you might need less than 1/4 cup).  To make them gluten free, use rice flour (also called for in the original recipe).

This dough is dangerously delicious (almost better than the baked cookies).  Try it without fear since it's egg-free.

Feel virtuous about all the nuts and grains in your chocolate chip cookies!


Ingredients (adapted from the back of the Ancient Harvest bag; makes two dozen):

1 stick butter, softened
1/4 cup honey
1/2 cup light brown sugar, packed
1/2 cup almond butter
1/2 teaspoon vanilla
1 cup flour
3/4 cup quinoa flakes
1 teaspoon baking soda
1/4 teaspoon salt
2/3 cup chopped semisweet chocolate or chocolate chips (or use more or less to taste)

Preheat the oven to 350.  Line two baking sheets with parchment paper.

In a large bowl, cream the butter with the honey, brown sugar, almond butter, and vanilla.  In a small bowl, whisk together the flour, quinoa flakes, baking soda, and salt.  Add the dry ingredients to the large bowl and mix until combined.  Fold in chocolate chips.

Drop heaping teaspoons of dough onto the parchment paper and bake for 10-15 minutes, until just golden on top but not burned on the bottom.  Let cool on the cookie sheet for a minute or so, then transfer carefully to a rack.  The cookies will seem very unstable, but firm up as they cool.

Yum

Thursday, May 30, 2013

Mocha Chip Cookies and A GIVEAWAY


For my two month blogiversary, I decided to do my first giveaway!  I've been enjoying Aida Mollenkamp's cookbook, Keys to the Kitchen, and will be giving away a copy to one reader.  Scroll down to see how enter.

Keys to the Kitchen is a great cookbook because it covers basic kitchen skills, but also includes really unique recipes with interesting flavor combinations.  Each recipe is designed to teach a certain technique, and the recipes include detailed notes about equipment, substitutions, variations, and recipes-within-a-recipe ideas.


In the back of the book are tons of helpful suggestions for menu ideas, party planning, quick and stress-free recipes, and even cleaning solutions.

I had to try a recipe for chocolate chip cookies with ground coffee.  And, if you love coffee and chocolate as much as I do, this recipe is for you!


Ingredients (from Keys to the Kitchen; makes about 2 dozen cookies):

2 1/4 cups flour
1/3 cup finely ground coffee beans
1 teaspoon baking soda
1 teaspoon salt
1 cup (2 sticks) unsalted butter, at room temperature
3/4 cup sugar
1/2 cup light brown sugar, packed
2 large eggs, at room temperature
2 teaspoons vanilla
2 cups milk chocolate chips (I used 1 cup dark chocolate chips since that was all I had)

Preheat the oven to 350.  Cover two baking sheets with parchment paper.

Whisk the flour, coffee, baking soda, and salt in a medium bowl.  In a large bowl, beat the sugars and butter on high speed until light and fluffy, about 3 minutes.  Add the eggs and vanilla and beat until well mixed.

Add the flour mixture, and use a spatula to stir just until combined.  Fold in the chocolate chips.

Drop 2-tablespoon balls of dough onto the cookie sheets, leaving two inches between cookies (they will expand a lot--mine all ran together).  You can use an ice cream scoop, but I think mine holds more than two tablespoons, so my cookies were big.

Bake for 12-15 minutes, until puffed in the center and browned on the edges.  Cool on a rack.  Cookies can be stored at room temp in an airtight container for up to a week if you have lots of self control.

Enter to win the giveaway using the widget below!

a Rafflecopter giveaway
Yum

Saturday, May 25, 2013

Honey Vanilla Cookies to Kickstart Jesi's Art


Have you heard of colony collapse disorder?  My friend Jesi, an artist based in Vermont, is working on a participatory project with a large installation about colony collapse disorder and the plight of the honeybee.  The coolest part is that she's creating a canvas for each person who sponsors her project, in different sizes depending on the amount you donate, and sending them out to her supporters after the show!  Her art is amazing and I can't wait to see what she creates for this show.

Jesi asked me to post a honey cookie recipe that she could bake to show her thanks to supporters who pledge $25 or more.  Her project only has one more day left on Kickstarter!  You can read about the project and donate here.  You should consider giving!  Even if you don't have $25 to give, give any amount and then make yourself these cookies!  Jesi and the honeybees will thank you.

Note: I hadn't used my honey in a while and it was totally crystallized!  Don't worry if that happens to you.  Just spoon out your honey into a glass jar and heat it in a pan of simmering water, stirring occasionally, until it's clear and liquefied.  If you do this, let the honey cool down a little before you add it to the dough.


Ingredients (makes one dozen; adapted from this recipe on Lulu the Baker):

1 cup flour
1/3 cup sugar
6 tablespoons cold salted butter, cubed (or use unsalted and add 1/2 teaspoon salt)
1/2 vanilla bean
2 tablespoons honey, plus extra for brushing
Flaky sea salt (I use Maldon), optional

In a food processor, blend the flour, sugar, and butter until it looks like coarse breadcrumbs.

Add the honey and vanilla bean seeds and pulse just until combined.  Use your hands to pat the dough into a ball, wrap it in plastic wrap, and refrigerate for half an hour or so.  Try not to eat all the dough at this point.  It's delicious!

Preheat the oven to 325.

On a lightly floured surface, roll the dough out to about 1/4 inch thick.  Using a cookie cutter or round jar, cut out cookies about 2 inches across.  Place on a parchment lined baking sheet and bake for about 10-12 minutes, until the cookies are starting to brown around the edges.

Brush the cookies with honey while they're still warm, and sprinkle with a little flaky sea salt if desired. I love the salty and sweet combo, so I highly recommend it!


Yum

Thursday, May 9, 2013

Mint Mocha Ice Cream Cake


Okay guys, this is it.  If you are looking for a birthday treat that will be good but nothing over-the-top, DON'T pick this.  This is actually a seven-layer ice cream cake.  If you like seven-layer dip, you need to know this cake is nothing like it.  This cake is so much better, it's almost wrong to mention seven-layer dip in the same sentence.

Have you made slutty brownies yet?  They have a brownie layer, an Oreo layer, and a chocolate chip cookie layer.  For this cake, those extravagant bars are baked in a round springform pan.  Two kinds of ice cream are smoothed on top, then the whole thing is coated with vanilla bean whipped cream and drizzled with chocolate ganache.  BOOM.

This cake is adapted from the Slutty Brownie Ice Cream Cake on What's Gaby Cooking, one of my favorite food blogs ever.  Since the cake was for my boyfriend's birthday, I had to let him pick the ice cream flavors.  When he chose mint chocolate chip and coffee oreo, I was a little bit skeptical.  I love both those flavors independently, but together?  I wasn't so sure.

Well, I have to give credit to the birthday boy--it was fabulous!  A mint mocha in ice cream cake form.  There are lots of other flavor combinations that would be amazing, though!  I hope you try your own version of this for your next over-the-top occasion.


Note:  Like many ice cream cakes, this is a little bit of a plan-ahead project.  I baked the slutty brownies on Tuesday, layered on the ice creams and froze everything yesterday, and added the whipped cream and ganache today.  

Ingredients:

1 recipe slutty brownies, baked in a 9-inch springform pan (underbake them a little--brownie layer should be a little jiggly--so they won't be too hard once they're frozen)
1 pint coffee oreo ice cream, softened
1 pint mint chocolate chip ice cream, softened
1 1/2 cups heavy cream, divided
Seeds from 1 vanilla bean, divided
Pinch of salt
4 ounces bittersweet chocolate
2 tablespoons brewed coffee
1 teaspoon granulated sugar
2 teaspoons powdered sugar, sifted

When the slutty brownies are completely cool, top with one of the pints of ice cream and smooth with a spatula.  Freeze for 2 hours or more, then repeat with the other ice cream flavor.  Freeze for at least two hours again.

To make the chocolate ganache, roughly chop the chocolate and set aside in a medium bowl.  Place 1/2 cup heavy cream and the coffee, granulated sugar and salt in a small saucepan.  Scrape in the seeds of half a vanilla bean (save the other half for the whipped cream).  Heat the cream mixture until scalded (about to boil), then pour it over the chocolate.  Cover and let sit for 5 minutes, then stir until smooth.  Set aside to cool before using.

To make the whipped cream, combine the remaining cup of heavy cream and the seeds from the other half of the vanilla bean in a large bowl.  Beat on high using an electric mixer until medium peaks form. Add the powdered sugar and beat again to combine or until stiff peaks form.

To serve, remove the ice cream cake from the springform pan.  Spread the whipped cream on top, then drizzle on the chocolate ganache.  Slice and go crazy!


Yum