Showing posts with label vanilla bean. Show all posts

Wednesday, February 12, 2014

Vanilla Bean Buttercream Brownies


The large amount of frosting on these brownies represents the large amount of love I have for you!  It constantly makes my day that people actually read my blog, and I'm even more thrilled when I get a comment or get to connect with you on FB, Twitter, or IG.  You are the best, and that is why I made you the best brownies.

I've been wanting to make frosted brownies for a while now.  They just seem fabulously over the top--because once you've baked a rich and fudgy brownie, you totally need a big pile of buttercream on top, right?  (Hint: the answer is yes!)

Yum

Sunday, January 26, 2014

Vanilla Chai Spiced Ghee + Chai Ghee "Latte" (Whole30 Day 26)


I am so obsessed with ghee.  Ever since I followed Nom Nom Paleo's instructions and made my first batch, it's been a staple in my kitchen.  First of all, it smells amazing.  Second, it's easy to make.  Third, it has a high smoke point, which means it won't burn like butter does during high-heat cooking.  Fourth, it tastes great with everything.  And bonus--it's lactose and casein free.

I've even been putting a teaspoon or so of ghee and coconut oil in my morning coffee (inspired by Stupid Easy Paleo).  After a short blitz with the immersion blender, it's foamy like a latte.  Delicious.  Basically, ghee is saving my Whole30 life.

Yum

Sunday, November 3, 2013

Mocha Mexicano & A Giveaway (Paleo, Gluten-free, Vegan)


This mocha mexicano is full of warm spices, and packs a subtle punch thanks to a little cayenne pepper.  It's inspired by ingredients from Rodelle Vanilla and Taza's Fire Puncher chocolate.

This summer, my vegan & paleo strawberry ice cream was a runner-up in Rodelle Vanilla's Great American Ice Cream Contest, and the prize was a basket of Rodelle Baking Goodies.  I asked the wonderful folks at Rodelle if they would include a few extra goodies for you all, and they said yes!  I picked up a couple of other treats over at Taza Chocolate yesterday, and am beyond excited to bring you a vanilla and chocolate giveaway.

Prize basket
One winner will receive a prize basket including:
  • Two whole Madagascar Vanilla Beans from Rodelle
  • A 6-ounce bottle of Rodelle Pure Madagascar Vanilla Extract
  • A 2-ounce bottle of Rodelle Organic Chocolate Extract
  • A 2-ounce bottle of Rodelle Anise Extract
  • Two discs of Taza Chocolate's Organic Fire Puncher 70% Dark Chocolate Mexicano (2.7 ounces)
  • A bag of Taza's Organic 55% Dark Chocolate Covered Cacao Nibs (2 ounces)
  • A recipe card for Molten Spiced Chocolate cake and a Direct Trade pamphlet from Taza


Yum

Sunday, September 8, 2013

Vanilla Bean Cupcakes with Mocha Buttercream (Paleo, Gluten-free)


I really enjoyed the spiced honey & corn cupcakes I made the other day, but they also left me craving a more classic cupcake.  To me, vanilla beans are the epitome of classic elegance in dessert flavor form.  I ordered half a pound of vanilla beans online months ago, used half of them to make a bunch of little bottles of vanilla extract, and still have a bunch left.  I highly recommend ordering beans online in bulk, since it's much more economical and they're likely to be much fresher than overpriced grocery store beans.

These cupcakes are light and fluffy, because they're made with coconut flour instead of almond flour.  Of all the paleo & gluten-free treats I've made, these may be the closest in taste and texture to their gluten-laden cousins.  I highly recommend them!  They're also perfect for people with nut allergies or for bringing to birthday celebrations in nut-free classrooms.  This recipe makes a very small batch (good for people like me with no restraint), but can easily be doubled.

Yum

Friday, July 26, 2013

Apricot Vanilla Cookies (Paleo, Gluten-free, No Sugar Added)


Yesterday I really wanted something sweet.  I've had good success so far making paleo treats sweetened with honey, but you're not allowed to have honey during the Whole30.  I thought there was nothing I could do to satisfy my sweet tooth, but then I remembered reading some of the fine print down at the bottom of the Whole30 site, where it said that fruit juice could be used as a sweetener.  At the time, I hadn't been able to imagine how fruit juice could make an adequate sweetener.  But, in my time of desperate sweets craving, I started to think maybe I could do something with this.

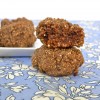
These cookies are sweetened with apple juice and dried apricots.  They don't taste like apple, but they do have a nice apricot flavor and a fun subtle orange hue.  They are, not surprisingly, not very sweet.  I won't judge you if you want to add a couple of tablespoons of honey.  If you do, you might want to add a little more almond flour as well (or less apple juice) so the batter won't be too wet.

If you like a moist, rich cookie that's guilt-free, these are for you.  The vanilla bean seeds, butter, and almond flour provide lots of great flavor and texture to make up for the cookies not being overly sweet.  And, with only five ingredients plus salt, these cookies couldn't be easier to make!  However, I'm not going to lie to you: they are not crispy at all.  I haven't figured out how to make gluten-free cookies crispy.  If you have the secret, please share it!  If you're looking for a sweeter cookie, check out the "You might also like" section at the end of this post.


Ingredients (makes about 15 cookies):

1/2 cup dried apricots, soaked in warm water for 10-20 minutes
1/2 cup apple juice
1 cup almond flour
6 tablespoons cold butter, cut into chunks
1/2 vanilla bean
1/4 teaspoon salt

Preheat the oven to 325, and line a baking sheet with parchment paper.  Drain the dried apricots and place them in a food processor with the apple juice.  Process, scraping down the bowl as necessary, until the mixture has a jam-like texture with very small pieces of apricot.

Add the almond flour, butter, and salt, and scrape in the vanilla bean seeds.  Process until well combined.  Spoon tablespoon sized balls of batter onto the prepared sheet and flatten them slightly (cookies will not spread as they bake).  Bake for about 12 minutes, until golden brown around the edges.  Cool for a few minutes on the sheet, then carefully transfer to a rack to cool completely.


You might also like:

Chewy Chocolate Almond Cookies (gluten-free, dairy-free)


Chocolate Chip Cookies (paleo, gluten-free)


Yum

Saturday, July 13, 2013

Triple Berry Almond Clafoutis


Berries and almonds go together well (see evidence here, here, and here).  So when I saw a clafoutis recipe that called for almond extract, I figured it would be even better with actual almonds, too.  And while I haven't tried this recipe without almonds, I'm pretty sure I'm right.

Wait!  Did I forget to tell you what a clafoutis is?  When Ben woke up this morning and I told him what I was making, he made some really good joke about doing Krav Maga in footie pajamas.  I think he thought I said krav footie?  Anyway, a clafoutis is a French cake that's basically pancake batter poured over fruit (traditionally cherries) and baked.  I guess it's a dessert, but I made it for breakfast.  With lots of eggs and fruit and just a little flour, sugar, and butter, I think it's totally healthy enough to be the first thing you eat in the morning.


Oh, and it's delicious!  It's almost like a custard, bursting with berries, and with a sweet almond crunch on top.  Bonus--it's really easy to make.  Without much trouble at all you can impress all your friends with your sweet culinary skills and knowledge of obscure dessert vocabulary in French.  Win-win-win (there was a third winning point in there somewhere, right?).

Ingredients (makes 8 servings; adapted from Bon Appetit and King Arthur):

3 cups mixed berries (I used frozen blueberries and fresh raspberries & blackberries)
2 tablespoons butter, melted
1/2 cup plus 2 teaspoons sugar, divided
1/2 vanilla bean
4 large eggs
1/4 teaspoon salt
1/2 teaspoon almond extract
3/4 cup milk (I used 2%)
1/2 cup flour
1/2 cup sliced almonds
Powdered sugar and whipped cream*, for serving

Preheat the oven to 350.  Lightly butter a 9 inch round cake pan and put the berries in it.  If your cake pan is 2 inches deep, that's perfect.  If it's 1 1/2 inches deep like mine, put it on a baking sheet just in case.  I didn't have any overflow but it was close!  This thing puffs up a lot.

Melt the butter and set aside to cool.  Place the 1/2 cup of sugar in a medium bowl, and scrape in the vanilla bean seeds.  Use your fingers to rub them together to evenly distribute the vanilla--this will make sure you don't end up with a few huge chunks of vanilla bean seeds.  Add the eggs, salt, almond extract, milk, and butter and whisk to combine.  Add the flour gradually, whisking until most of the lumps are gone.  Pour the batter over the fruit.  Top with the sliced almonds and then the two teaspoons of sugar.

Bake for 50 minutes to an hour, until the custard is set and the top is golden brown.  Let cool in the pan for a few minutes, then run a sharp knife around the edge to loosen the clafoutis.  Cut into wedges and serve warm or at room temperature, with powdered sugar and whipped cream if desired.

Refrigerate any leftovers you don't plan to eat within a few hours.  While clafoutis will keep in the fridge for two or three days, it's best on the day it's made.

*My new favorite way to whip cream is in a mason jar!  Put about 2/3 cup of heavy cream, a tablespoon of powdered sugar, and 1/4 teaspoon of vanilla in a jar.  Screw the lid on tightly and shake til it's ready (3-5 minutes).


Yum

Thursday, July 4, 2013

Fruit & Frangipane Galettes with Raspberry Swirl Ice Cream


Happy Fourth!  I'm sitting on my couch, listening to all the illegal fireworks popping down on my street, feeling full and happy.  

My mom and my good friend Annetta came over today.  Ben grilled hamburgers, Annetta brought pasta salad, my mom brought brie, and I made red, white, and bleu macaroni and cheese.  The best part was that Annetta came early and helped me make these galettes.  We had so much fun!  Galettes are like pies but easier since you don't have to fit the dough into a pan or trim it or anything.  I actually think they're prettier, too!  These galettes have a layer of delicious frangipane inside, and you can make them with pretty much any kind of fruit.

I made the galette dough and the frangipane last night, so it was easy to roll out the dough and assemble the galettes this afternoon.  It's great to be able to prep the components in advance and then throw it all together right before dinner.


Galettes need ice cream on top, at least in the summer.  I was going to just make vanilla bean ice cream, but then I saw the extra raspberry coulis that I made to go with my panna cotta sitting in the fridge.  That stuff was begging to be swirled into the ice cream!  In the end, I think it was the best ice cream I've ever made.  You have to try it!  There wasn't even quite enough raspberry coulis left for my tastes--next time I'm going to put in more.

The galette recipe is adapted from Alexandra Cooks and the ice cream is adapted from David Lebovitz's The Perfect Scoop via Annie's Eats.

Ingredients for the galettes (serves about 8):

Dough (recipe below)
Frangipane (recipe below)
4 small or 2 large stone fruits or 2 cups of berries, or a combination
2 tablespoons melted butter
4 teaspoons sugar


For the galette dough (makes two 9-inch galettes):

2 1/2 cups flour
2 tablespoons sugar
1/2 teaspoon salt
2 sticks (16 tablespoons) butter, cold
1/2 cup plus 2 tablespoons ice water, plus extra if necessary

To make the dough, pulse the flour, sugar, and salt in a food processor until well mixed.  Cut the butter into chunks and add them to the bowl of the food processor.  Process using short pulses until the butter is the size of peas.  Add the ice water and stir with a fork until the dough comes together into a mass, adding more ice water a little at a time if necessary.  Divide the dough into two even balls, flatten slightly, wrap in plastic wrap, and refrigerate until ready to use (dough can be made up to a week ahead).

For the frangipane (makes about a cup; you'll have extra):

1 cup ground almonds (almond flour) and/or pecans (I used a mix of almond flour and pecans I ground in the food processor)
1/4 cup sugar
Pinch of salt
4 tablespoons butter, softened
1 egg
1/4 teaspoon vanilla
1 tablespoon rum, brandy, or bourbon (optional)

Pulse all ingredients in the food processor (bonus: you don't have to wash it out if you just made the dough in it) until smooth.  Store in the refrigerator for up to one week until ready to use.

To assemble the galettes, preheat the oven to 400.   Roll out one piece of dough on a lightly floured surface until it forms an 11-inch circle, adding flour as needed so it doesn't stick.  Transfer the dough to a cookie sheet lined with parchment paper, and refrigerate while you roll out the other piece in the same way.

Switch the cookie sheets so you're working with the chilled circle of dough and the one you just rolled out is in the fridge.  Spread about 1/4 cup of frangipane on the dough, leaving a two inch border around the edge.  If using stone fruits, pit them and slice them 1/2 inch thick.  Layer the fruit on top of the frangipane.  We used 2 plums for one galette and a heaping cup of blueberries for the other.  Moving around the edge of the dough, fold in overlapping segments of dough to encase the filling (it's easy to do because these galettes are supposed to look rustic!).  Refrigerate that galette while you prep the other.

Brush the dough of both galettes with melted butter, and sprinkle about two teaspoons of sugar over the fruit and dough of each galette.  Bake for about 20-30 minutes, until the crust is golden brown on top but not burned on the bottom.  Cool on the cookie sheets for a few minutes, then transfer to a wire rack to cool completely.  Cut into wedges and serve with ice cream on top.


Ingredients for the ice cream (serves 6):

2 cups heavy cream, divided
2/3 cup sugar
Pinch of salt
1 vanilla bean
1 cup milk (I use 2%)
1 teaspoon vanilla extract
1/2 cup raspberry coulis

In a medium saucepan, stir together half the cream with the sugar and salt.  Cut the vanilla bean in half lengthwise, scrape the seeds into the mix, and throw the pod in, too.  Heat over medium heat, stirring often, until the sugar is all dissolved.

Stir in the rest of the cream, the milk, and the vanilla.  Refrigerate the mixture until it's totally chilled (I'm impatient, so I usually stick mine in the freezer for about an hour).  Remove the vanilla bean and freeze in your ice cream maker.

In the bottom of an airtight container (freezing this container beforehand is a nice touch on a hot day), spoon a layer of raspberry coulis.  Top with a layer of ice cream, and continue to layer the coulis and ice cream until they're all packed up.  This will create beautiful raspberry swirls when you scoop your ice cream.  Freeze for at least two hours before serving.


Yum

Friday, June 14, 2013

Brownie Sundae Cupcakes


These cupcakes feature the essential elements of a brownie sundae in a convenient, easy to serve and eat form.  I made them for the kids and they were a big hit at the pajama dance party we had today (we filled the dinosaur jar again).  Some kids were guilty of just licking the ice cream off the top and leaving the brownie, but most of them polished off the whole thing.

You could just make this with your favorite brownie recipe and your favorite homemade or store bought ice cream to save time.  I ended up making my brownies with olive oil because it was the ONLY thing left in my kitchen, but they turned out great!  Nobody noticed anything at all, and I felt a little less guilty about enjoying several of these cupcakes over the last 24 hours.


I got the inspiration and ganache for these from Joy the Baker, modified this ice cream recipe from Annie's Eats, and adapted this brownie recipe from food.com.  I can't wait to make these again with a different flavor of ice cream.  And then maybe with blondies instead of brownies?  The possibilities are endless.  And some whipped cream on top, maybe?  I totally wanted to do that, but all the cream was used up making the ice cream.


Ingredients (makes about 30 brownie cupcakes):

For the brownies:

1/3 cup chocolate chips, melted
1 cup olive oil
2 cups sugar
2 teaspoons vanilla
4 large eggs
1/2 teaspoon baking powder
1/2 teaspoon salt
1 cup flour
2/3 cup cocoa powder

For the vanilla bean ice cream (makes about 2 quarts):

3 cups heavy cream, divided
1 1/2 cups milk (I used 2%)
Pinch of salt
3/4 cup sugar
1 vanilla bean, halved lengthwise
1 1/2 teaspoons vanilla extract

For the ganache:

1 cup chocolate chips
1/3 cup milk or cream
1/2 teaspoon vanilla

To make the ice cream, heat half the cream in a medium saucepan with the salt, sugar, and vanilla bean (scrape in the seeds, then throw the bean in, too).  Stir occasionally until all the sugar has dissolved.  Remove from heat and stir in the remaining milk and cream.  Chill the mixture thoroughly, remove the vanilla bean, then freeze in your ice cream maker.

To make the brownies, preheat the oven to 350 and line 30 muffin cups with paper liners.  Mix together the oil, sugar, and melted chocolate chips in a large bowl.  Stir in the eggs and vanilla.  In a separate bowl, whisk together all the remaining dry ingredients.  Combine the wet and dry ingredients until no floury spots remain.  Divide the batter among the cupcake cups (don't add too much--you want the batter to just cover the bottom of the cupcake paper so you'll have room for the ice cream later).  Bake for 8 or so minutes until set.  It's better to underbake these a little since they'll harden up in the freezer later.  Cool to room temperature, then transfer to the freezer for at least 30 minutes before adding the ice cream.

To make the ganache, set the chocolate chips aside in a bowl and heat the milk or cream until scalded.  Pour it over the chocolate chips, cover, and let sit for a few minutes.  Stir in the vanilla.  If your chocolate isn't totally melted, microwave in 15-second intervals and stir until smooth.  Cool to room temperature before using.

To put the cupcakes together, spoon softened ice cream (right from the machine is perfect) over chilled brownies to fill the cupcake papers.  Freeze cupcakes for at least an hour.  Using a spoon, top each cupcake with a teaspoon or so of ganache.  Store in the freezer, and remove about five minutes before serving.

Yum

Monday, June 10, 2013

Vanilla Bean Financiers


Ever since I found out about financiers, I've been wanting to make them.  They are French cakelets made with brown butter and almond flour, and traditionally baked in a financier mold (I really want one, but haven't gotten myself one yet).  Some people say a bakery near Paris' financial district started making these cookies and calling them financiers because they're shaped like bars of gold.  Others say they are called that because they're so rich that only financiers can afford to eat them.


Either way, I knew I was going to love the combination of brown butter and almond flour, and I did!  I added vanilla bean because I love the taste of vanilla and almond together, but to be more traditional you could leave the vanilla out.  If you make this version, you'll notice beautiful little flecks in two shades of brown: dark brown from the vanilla bean seeds and golden brown from the brown butter.  So pretty!

Once I get my financier pans, I want to try making some fruit-studded financiers--maybe a few raspberries or thin slices of peach on top.


These financiers are best warm and fresh from the oven, but are also delicious the next day, especially dunked in some milk or coffee.

Ingredients (makes 18 mini-muffin sized financiers; adapted from Dorie Greenspan's recipe):

1 1/2 sticks (12 tablespoons) unsalted butter
1 cup sugar
1 cup almond flour
6 egg whites
1/2 vanilla bean
1 cup flour*

In a medium saucepan, melt the butter over medium heat.  Continue to cook, swirling the pan occasionally, until the butter comes to a boil and browns.  As soon as the butter browns, remove the pan from the heat.  (If you haven't browned butter before, check out this step-by-step tutorial from How Sweet It Is.)

In another saucepan, stir together the sugar and almond flour.  Scrape in the seeds from the vanilla bean.  Using your fingers, rub the mixture to evenly distribute the vanilla.  Stir in the egg whites.  Heat the mixture over low heat, stirring constantly with a wooden spoon, until the mixture is runny, lightened, and hot.

Remove from the heat and stir in the flour.  Gradually mix in the butter.

Refrigerate the batter for at least one hour, or up to three days, with plastic wrap right on top of the surface to keep out air.

Preheat your oven to 400.  Butter mini muffin tins or financier molds, then dust with flour and tap out any extra.  Fill molds almost to the top with batter and bake for 10-13 minutes, until puffed, golden brown around the edges, and set.

Turn out financiers onto a wire rack and cool to room temperature (or enjoy them warm).

*The recipe only called for 2/3 of a cup and I meant to follow it exactly except for the addition of the vanilla bean, but read the quantity wrong when I glanced at the recipe before adding the flour.  The cookies still turned out great.  You could try them with 2/3 or a full cup of flour; I just wanted to report exactly what I did.  Next time I'll check twice!


Yum

Sunday, May 26, 2013

Double Strawberry Ice Cream


You may have noticed I am on a bit of a strawberry kick recently (see no-bake strawberry swirl cheesecake bars, strawberry shortcakes with balsamic chocolate glaze, strawberry & cream margaritas, and strawberry curd).  Well, the strawberry love continues.  This is partly because I still have a jar of strawberry curd in my fridge, and am tempted to add it to just about anything.  However, if you don't feel like making strawberry curd (but really, why wouldn't you?  twenty minutes and your strawberries will last for weeks in the fridge in a delicious, spreadable form) you can still make this ice cream.  Just omit the strawberry curd for single strawberry ice cream, or replace it with an equal amount of fresh strawberry puree.


This ice cream is rich and creamy thanks to the vanilla bean, strawberry curd, and custard base.  You have to try it!  It's also a wonderfully pastel shade of pink, my favorite color.


Ingredients (makes 1 1/2 quarts, adapted from Martha Stewart):

8 egg yolks (save the whites for breakfast or meringues)
2/3 cup plus 2 tablespoons sugar, divided
2 cups milk (I used 2%, but Martha calls for skim)
1/4 teaspoon salt
1/2 vanilla bean
1 pound strawberries, hulled and finely chopped
2 cups heavy cream
1/3 cup strawberry curd or fresh strawberry puree

In a saucepan (off the heat for now), combine the egg yolks, 2/3 cup of sugar, and salt.  Gradually whisk in the milk.  Scrape the seeds of half a vanilla bean into the mix, and throw the bean in, too.

Heat the mixture over medium heat and stir constantly with a wooden spoon until thickened, about 10-15 minutes.

Prepare a bowl set oven an ice bath (a larger bowl filled with ice or ice water).  Place a fine-meshed sieve on top.  Pour the thickened custard through the sieve, discarding the vanilla bean.  Stir in the cream and strawberry curd.  Let the mixture chill, stirring occasionally.  When the mixture is cold, I recommend you refrigerate it overnight to make sure it's REALLY chilled.

Mix the chopped strawberries with 2 tablespoons of sugar and set aside.

When the custard mixture is completely chilled, freeze in your ice cream maker.  A few minutes before the ice cream is ready, add in the strawberries.

Transfer to an airtight container and freeze for at least 2 hours before serving.

You can also sandwich some of this between two honey vanilla cookies for the world's best ice cream sandwich!

Yum

Saturday, May 25, 2013

Honey Vanilla Cookies to Kickstart Jesi's Art


Have you heard of colony collapse disorder?  My friend Jesi, an artist based in Vermont, is working on a participatory project with a large installation about colony collapse disorder and the plight of the honeybee.  The coolest part is that she's creating a canvas for each person who sponsors her project, in different sizes depending on the amount you donate, and sending them out to her supporters after the show!  Her art is amazing and I can't wait to see what she creates for this show.

Jesi asked me to post a honey cookie recipe that she could bake to show her thanks to supporters who pledge $25 or more.  Her project only has one more day left on Kickstarter!  You can read about the project and donate here.  You should consider giving!  Even if you don't have $25 to give, give any amount and then make yourself these cookies!  Jesi and the honeybees will thank you.

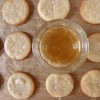
Note: I hadn't used my honey in a while and it was totally crystallized!  Don't worry if that happens to you.  Just spoon out your honey into a glass jar and heat it in a pan of simmering water, stirring occasionally, until it's clear and liquefied.  If you do this, let the honey cool down a little before you add it to the dough.


Ingredients (makes one dozen; adapted from this recipe on Lulu the Baker):

1 cup flour
1/3 cup sugar
6 tablespoons cold salted butter, cubed (or use unsalted and add 1/2 teaspoon salt)
1/2 vanilla bean
2 tablespoons honey, plus extra for brushing
Flaky sea salt (I use Maldon), optional

In a food processor, blend the flour, sugar, and butter until it looks like coarse breadcrumbs.

Add the honey and vanilla bean seeds and pulse just until combined.  Use your hands to pat the dough into a ball, wrap it in plastic wrap, and refrigerate for half an hour or so.  Try not to eat all the dough at this point.  It's delicious!

Preheat the oven to 325.

On a lightly floured surface, roll the dough out to about 1/4 inch thick.  Using a cookie cutter or round jar, cut out cookies about 2 inches across.  Place on a parchment lined baking sheet and bake for about 10-12 minutes, until the cookies are starting to brown around the edges.

Brush the cookies with honey while they're still warm, and sprinkle with a little flaky sea salt if desired. I love the salty and sweet combo, so I highly recommend it!


Yum

Saturday, May 18, 2013

Carrot Cupcakes with Vanilla Bean Neufchatel Frosting


I have never been really into carrot cake.  Sometimes there are raisins in it.  It's a way to try to pass vegetables off as dessert.  It doesn't pair well with chocolate.


However, my boyfriend thinks it's the best kind of cake, so I had to make some for the joint birthday party we're throwing tonight.  And, I have become a carrot cake convert!  These cupcakes are so delicious, I wish I had made two dozen.  That way I could eat one dozen myself and no one at the party would be the wiser.


Are you a carrot cake fan?  If not, let this recipe turn you into one!  The moist, perfectly spiced cupcakes paired with the creamy, not-to-sweet, rich vanilla frosting--you're going to love it!


How adorable are these organic carrots I got?  They came with all their greens still attached, but were trimmed and peeled before I took this photo.


This recipe makes 12 cupcakes.  Double it to make 24.

Ingredients for the cupcakes (adapted from this recipe on Gimme Some Oven):

1 1/2 cups grated carrot (about half a pound of carrots, peeled)
1 1/4 cups flour
3/4 teaspoon baking powder
1/2 teaspoon baking soda
1/4 teaspoon salt
Rounded 1/2 teaspoon cinnamon
1/4 teaspoon nutmeg
Pinch of allspice
Zest of one orange
3/4 cup sugar
1/4 packed light brown sugar
2 eggs
3/4 cup vegetable oil

Preheat the oven to 350 and line a muffin tin with paper liners.

Use a food processor with the disc attachment to grate the carrots.  Measure to get 1 1/2 cups and set aside in a large bowl.

In a medium bowl, whisk to combine the flour with the next seven ingredients (through orange zest).

Rinse the food processor, and switch to the regular blade.  Blend the sugars and eggs until well combined, about 30 seconds.  With the machine running, add the oil in a steady stream, and continue to blend until well mixed, about 30 seconds.

Add the egg mixture and the flour to the bowl with the carrots, and mix until combined and no streaks of flour remain.

Scoop into cupcake liners and bake for 20-25 minutes, or until a toothpick comes out clean.

Ingredients for the frosting:

8 ounces Neufchatel cheese (you can substitute cream cheese)
8 tablespoons (1 stick) butter, softened
1/2 vanilla bean (you can substitute 1/2 teaspoon vanilla extract if you don't have a bean)
1 cup powdered sugar

In a large bowl, combine the Neufchatel, butter, and seeds from the vanilla bean.  Beat on high until well combined.  Sift in the sugar and beat again until smooth.  Wait until the cupcakes are completely cool to frost them.  Enjoy!

Yum

Sunday, May 12, 2013

Lemon Vanilla Bean Muffins


Happy Mother's Day!  What are you making for your mom today?  I'm making my mom these lemon vanilla bean muffins, and giving her a bottle of vanilla extract and a jar of preserved lemons.

I wanted to make my mom something much more extravagant, but she's been trying to eat healthy.  She actually asked me not to bake her anything at all, but that didn't feel right.  I did my best to lighten up these muffins somewhat.  They're lemony, and she loves citrus flavors.  They're also decadent with the addition of vanilla bean seeds.  I bet your mom would love these, too!


This recipe makes 12 muffins.

Ingredients (adapted from this recipe on Splash of Something):

1 1/2 cups flour (I used 1 cup regular and 1/2 cup whole wheat pastry flour)
1/2 cup sugar
1/2 teaspoon baking powder
1/4 teaspoon baking soda
1/4 teaspoon salt
1/2 cup unsalted butter (1 stick), melted and cooled
1/3 cup light agave nectar
1/3 cup milk (I used 2%)
2 eggs
Seeds from 1 vanilla bean, divided
Juice of one lemon
Zest of one lemon, divided

For the streusel topping:

1/4 cup flour
1/4 cup light brown sugar
2 tablespoons cold butter, diced
Pinch of salt

Melt the butter and set it aside to cool.  Preheat the oven to 325, and line a muffin tin with paper liners.

In a medium bowl, whisk together the flour, sugar, baking powder and soda, and salt.

In another bowl, mix together the cooled butter, agave nectar, milk, and eggs.  Scrape in the seeds from the vanilla bean, saving a bit (about a quarter) for the streusel topping.  Add the lemon juice and half the zest, saving the rest for the streusel.

Add the liquid ingredients to the dry and mix just until combined.  Divide the batter among your muffin cups (I use an ice cream scoop greased with cooking spray to make this easier).

To make the streusel, combine all ingredients with the reserved vanilla seeds and lemon zest.  Using your fingers, mix until the butter is incorporated and the mixture has a crumbly texture.  Sprinkle on top of the batter-filled muffin cups.  Bake for 20-25 minutes, until the tops of the muffins are light golden and a toothpick comes out clean.


Yum