

My next task was to find a great vegan cookie recipe. Since the cookies had to be nut-free, I soon realized it would be very hard to make them gluten-free as well. So, these cookies are a total gluten bomb. I promise to be back with more gluten-free eats very soon!

I found this recipe over on Yummy Mummy Kitchen, and was intrigued to see that she called them the best sugar cookies ever. I had to try them. This recipe uses softened coconut oil, which is creamed with the sugar just the way butter is in traditional sugar cookies. If you use unrefined coconut oil, the cookies will have a mild coconut flavor. To avoid that, just use refined coconut oil instead.
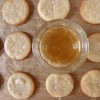
I used lemon zest, juice, and extract, along with plenty of vanilla, to give these cookies extra pizzazz and flavor. I was thrilled with how they turned out. They were perfectly browned and crisp around the edges and a tiny bit chewy in the middle, with the enticing aroma of fresh lemon and vanilla. Had I been served these cookies unawares, I would not have had any idea that they were vegan. Everyone at the party, vegans and others alike, found themselves reaching for a second, third, and perhaps a fourth cookie. These would be perfect for Christmas, Valentine's Day, or anytime! I hope you give them a try.

Ingredients (makes about 5 dozen cookies):
For the cookies (adapted from Yummy Mummy Kitchen):
1 1/2 cups powdered sugar
1 cup coconut oil
1/2 cup coconut milk, plus more as needed
Pinch of salt
1 teaspoon vanilla
1 teaspoon lemon extract
Zest of one lemon (1 to 1 1/2 teaspoons)
2 1/2 cups flour
2 tablespoons cornstarch
1 teaspoon baking soda
1 teaspoon cream of tartar
For the glaze*:
1/4 cup coconut oil, melted
3 tablespoons vanilla simple syrup or maple syrup
Pinch of salt
1 1/2 teaspoons lemon juice
1 teaspoon vanilla
Colorful sugar or sprinkles for decorating
*You can also make a simple frosting using 2 cups of powdered sugar, a few spoonfuls of coconut milk (just enough to get the right consistency), and a little lemon juice or vanilla extract. I made this particular glaze because I was all out of powdered sugar. Or, you can skip the glaze altogether and sprinkle sugar on the cookies before baking.
To make the cookies, combine the powdered sugar, softened coconut oil, coconut milk, salt, vanilla, lemon extract, and lemon zest in a large bowl. Beat with an electric mixer on medium speed until smooth and well-combined. Add the remaining ingredients, and stir by hand to incorporate. If the mixture seems crumbly, add more coconut milk a tablespoon at a time until the dough comes together and can be formed into a ball. Divide the dough in half, wrap each half in plastic wrap, and refrigerate for at least an hour and a half.
Remove the dough from the refrigerator about 15 minutes before you want to roll it out. Preheat the oven to 350, and line several baking sheets with parchment paper. When the dough has softened a bit, flatten one ball of dough with your hands and lightly flour both sides. Place the ball of dough between two sheets of parchment paper, and roll it out to 1/4 inch thick. Cut out your cookies, and place them on a lined baking sheet. When the baking sheet is full of cookies, place the sheet in the freezer for 5-10 minutes before baking. This keeps the cookies from spreading too much. If you don't plan on making glaze, but still want to decorate your cookies will colorful sugar, sprinkle it on before baking and press it in a bit.
Re-roll the scraps and cut out more cookies, then repeat with the other ball of dough. Bake each chilled sheet of cookies for 7-8 minutes, or until lightly browned around the edges. You can bake them a tiny bit more for crisper cookies or less for softer ones. Let the cookies cool for a few minutes on the sheet, then transfer to a wire rack to cool completely.
To make the glaze, whisk together all the ingredients. Brush the glaze onto the cooled cookies using a pastry brush, then sprinkle with sugar or sprinkles (smaller sprinkles will stick better than larger ones). The cookies will keep in an airtight container at room temperature for several days, but they may not stay crispy (or uneaten!) for that long.
This post contains affiliate links.
You might also like:
 Honey Vanilla Cookies
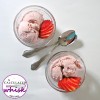
 Strawberry Ice Cream (Paleo, Gluten-free, Vegan)
 Lemon Coconut Vegan Ice Cream in a Cinnamon Sugar Bowl
**Did you know you can support A Calculated Whisk by clicking here to visit Amazon for your holiday shopping? When you access Amazon through my link, I receive a very small commission based on any items you purchase. It won't affect the prices you pay at all. Thank you so much for your support!
You might also like:

They were just so delicious! They tasted like custard to me ... must be the combination of the lemon plus zest and vanilla.
ReplyDeleteThank you :) Yes, it's a wonderful combination!
Delete